How to create a Meeting Type on Meeting Scheduler
Transform the way you schedule and manage meetings!
More meetings mean more opportunities. Your leads should be able to schedule meetings with you as conveniently as possible. This should be an indispensable part of your sales process.
But how do you avoid the back-and-forth to finalize dates with a prospect? How can you ensure that the right salesperson is assigned to the meeting? What happens when you have multiple leads to schedule meetings with?
Meeting Type on Meeting Scheduler is your answer! With Meeting Type, your leads can submit important information relevant to the meeting, view available time slots on your calendar, and book a meeting with you effortlessly.
All you need to do is set up a meeting type unique to each cohort of leads to seamlessly book meetings with you!
Moreover, with intelligent meeting distribution like Round-Robin, you can ensure that the right salesperson is assigned to the meeting - boosting conversion rates significantly!
Here’s how you can create a meeting type on Scheduler:
On Outplay, click the Scheduler tab on the top panel.

The Inbound Leads page is displayed by default. You can click the Meeting Type option from the sidebar menu.

On the following page, click Add Meeting Type.

Under Add Meeting Type, you have five sections:
Meeting Details
Forms
Form Styling
Routing Rules
Settings

Meeting Details
In the Meeting Details section, you can enter a Meeting Title and a Description for your meeting in their respective fields. You can select the duration of the meeting as well.

Forms
Under the Forms tab, you can:
Select an existing form by searching for the same.

Click the Create New Form button and start building a form from scratch as well.

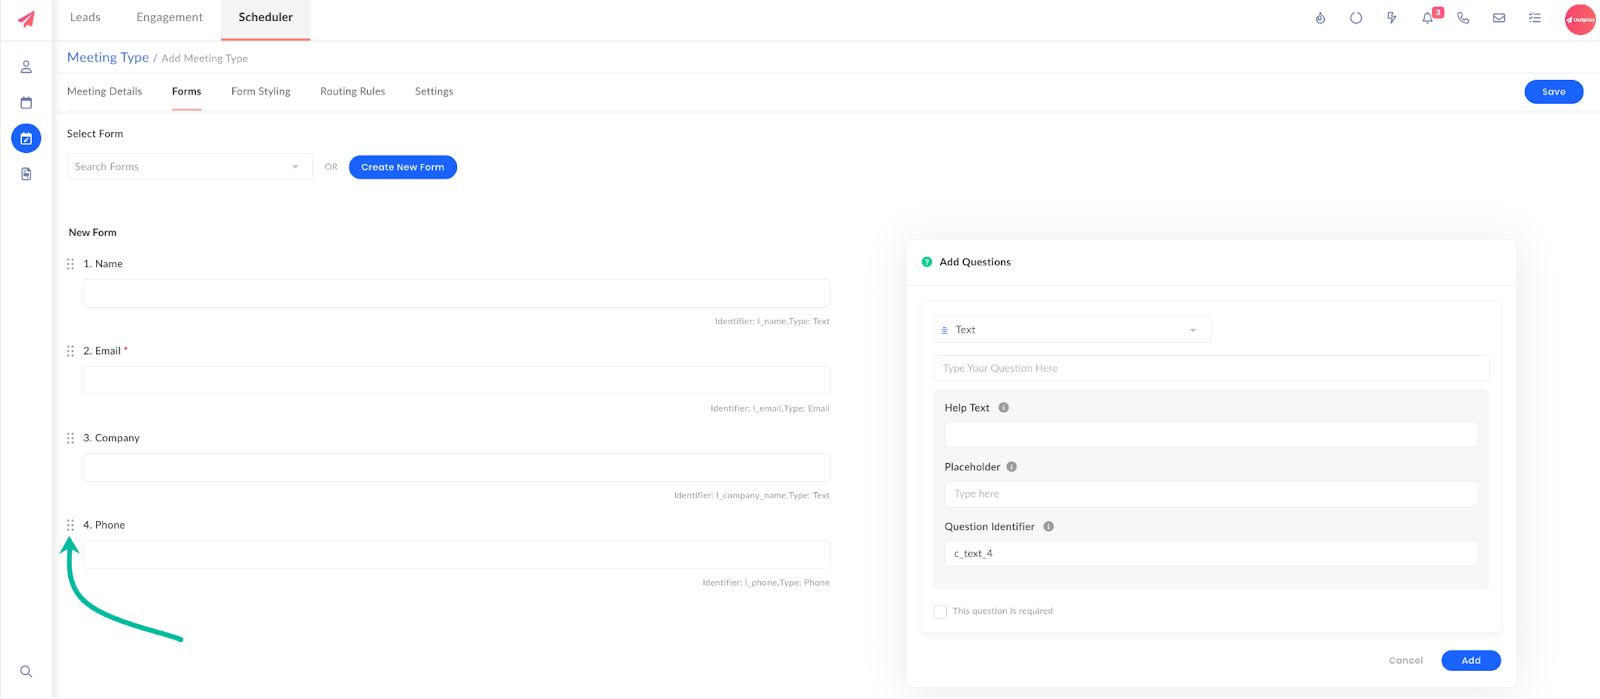
In the Questions section, there are default fields that you can use for your form. These fields are for Name, Email Address, Company and Phone.

You can use the Move icon to arrange the flow of the questions on your form.
NOTE: You can edit or delete default questions as per your requirement. Simply hover over the question to reveal the Edit & Delete option.

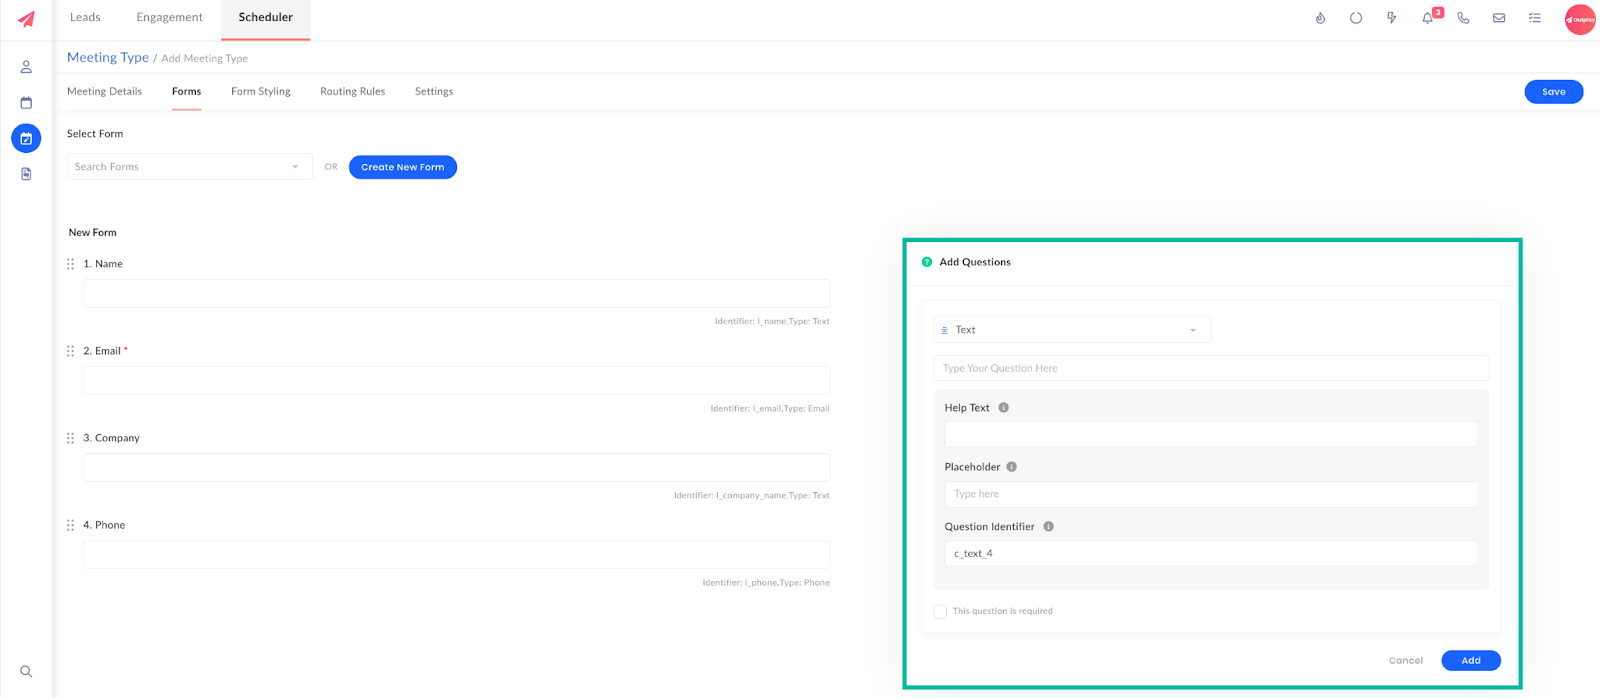
You can find the Add Questions section to your right.
Select the type of field you want to create on the form.
Enter the question in the first field.
In the Help Text field, you can enter tips to help the lead submit the right information.
In the Placeholder field, you can enter directions, for example: Enter your email address here.
In the Question Identifier field, you can enter a name/ identifier for the specific question. Question Identifiers come in handy while creating routing rules for a meeting type.
Select the checkbox for This question is required if you want to set the question as mandatory to submit the form.
Click Add.
Form Styling
In this section, there are 4 components on the form that you can style to match your brand style:
Headline & Description
Textboxes
CTA
Style
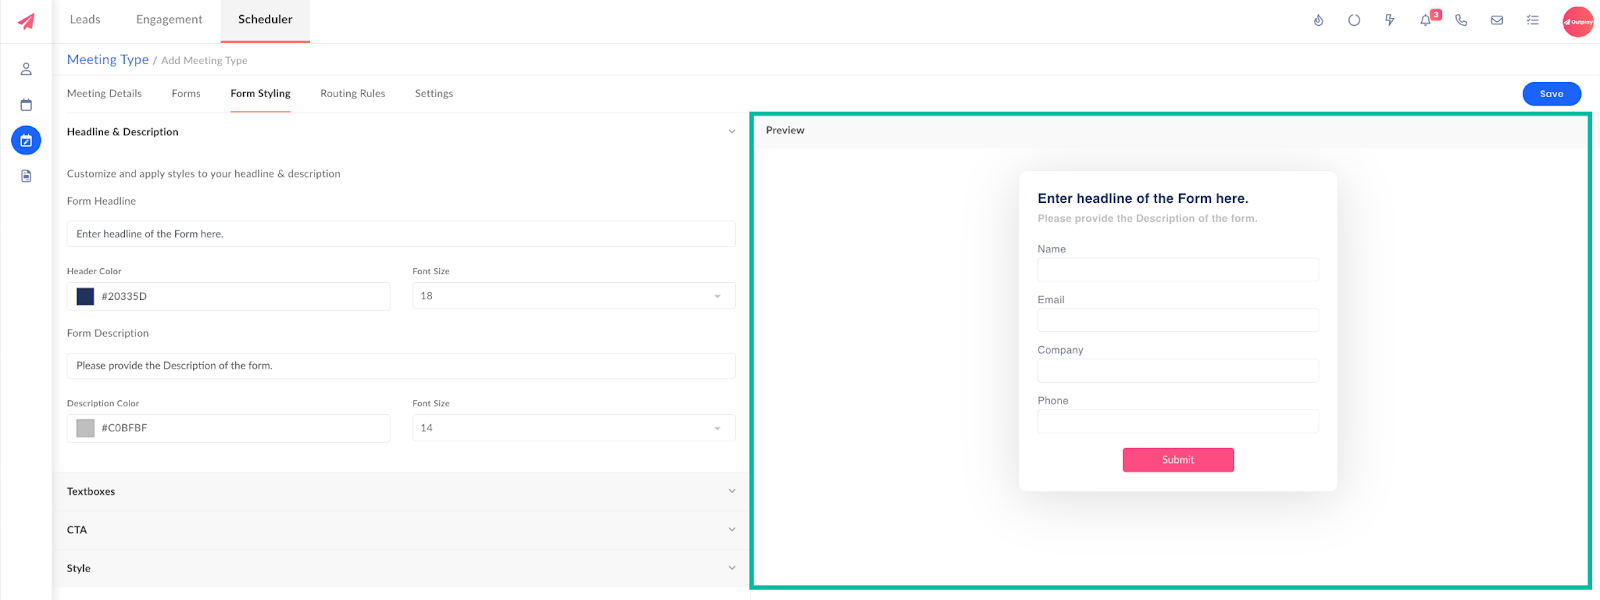
NOTE: Keep an eye on the Preview section to see how the form aligns with your brand style.
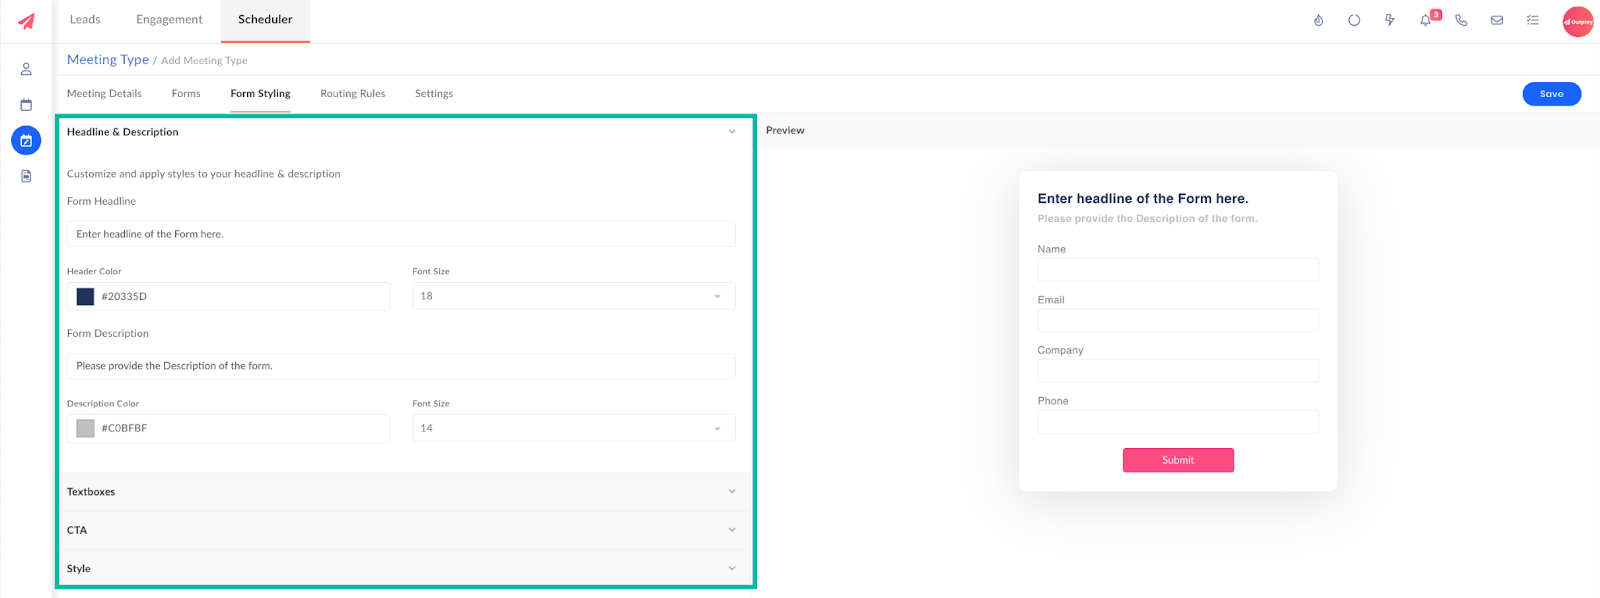
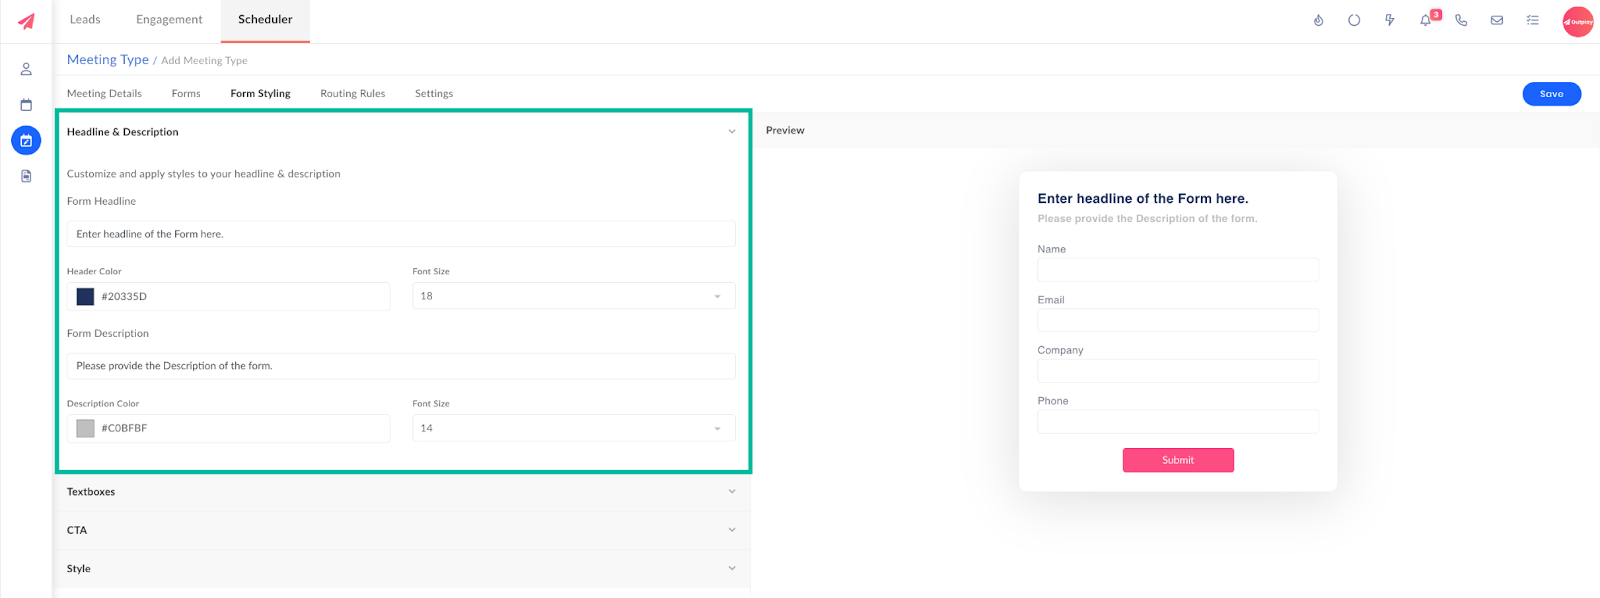
Headline & Description
In this section, you can define the purpose of your form by strategically composing the Headline and Description of your form.
To do so, you can complete the fields for the section as per the table below:
| Field | Description |
|---|---|
| Form Headline | Enter the headline of the form. |
| Header Color | Select the font color for the headline. |
| Header Font Size | Select the font size for the headline. |
| Form Description | Enter a description or summary for your form. |
| Description Color | Select the font color for the description. |
| Description Font Size | Select the font size for the description. |
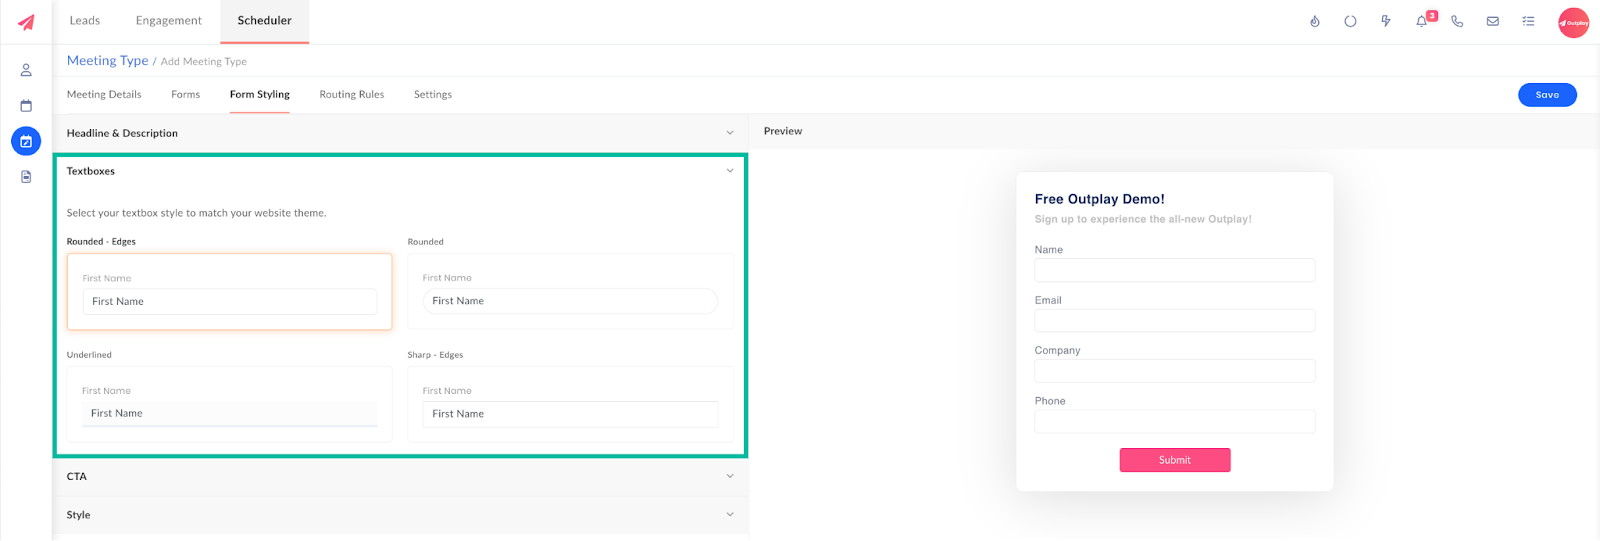
Textboxes
You can choose the shape for your text boxes in this section. You can select between:
Rounded - Edges
Rounded
Underlined
Sharp Edges
CTA
In this section, you can modify the Call To Action button on your form.
You can enter the text for the CTA button. For example: Submit.
Select the CTA button style to match the theme of your website or brand style. You can select between:
Rounded - Edges
Rounded
Sharp Edges

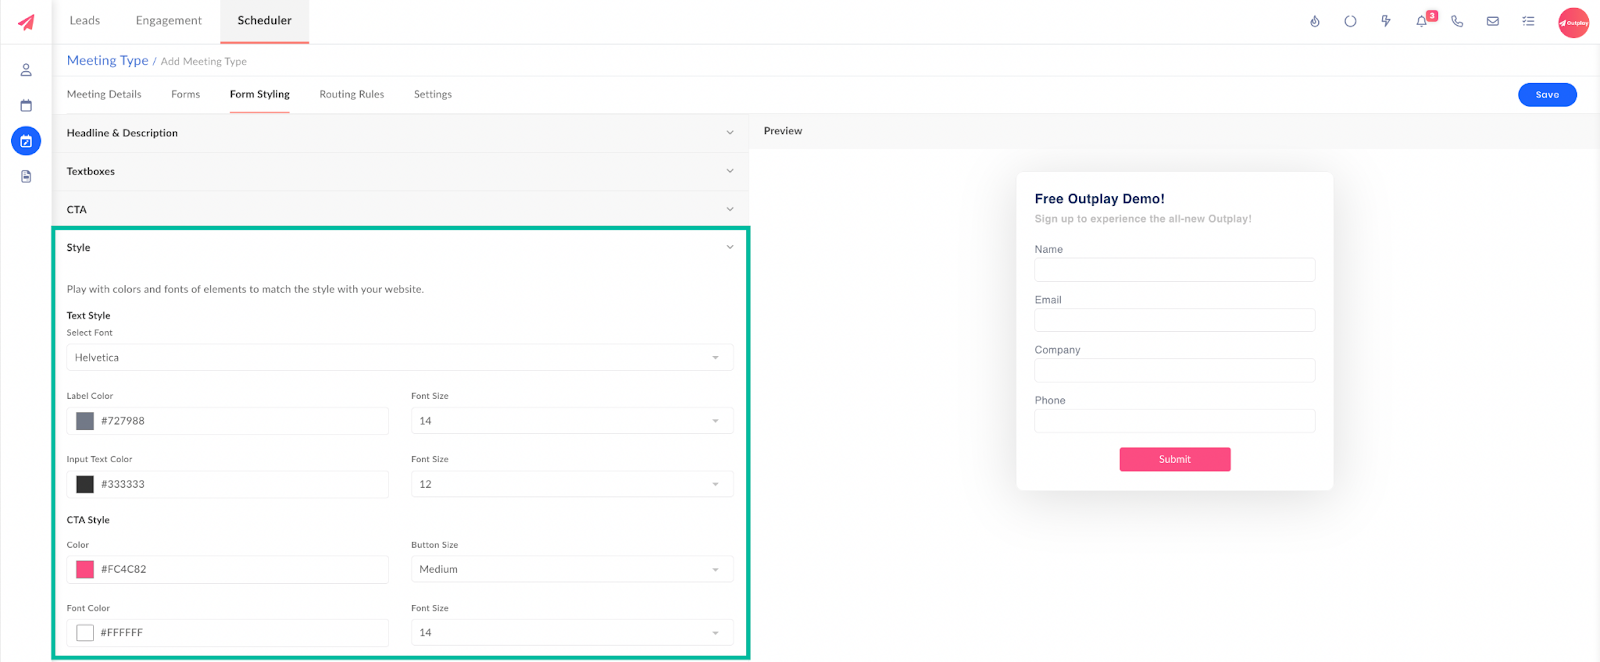
Style
You can play around with colors and fonts of elements on the form to match your brand style.
Under Text Style, you can complete the fields as the table below:
| Fields | Description |
|---|---|
| Select Font | Select the font style for the form. |
| Label Color | Select the color for the text on the form, such as the questions. |
| Label Font Size | Select the font size for the text on the form. |
| Input Text Color | Select the font color for the text entered by the lead. |
| Input Text Font Size | Select the font size for the text entered by the lead. |
Under CTA Style, you can complete the fields as the table below:
| Field | Description |
|---|---|
| Color | Select the color for the CTA button. |
| Button Size | Select the size for the CTA button. |
| Font Color | Select the font color for the text displayed within the CTA button. |
| Font Size | Select the font size for the text displayed within the CTA button. |
Qualification & Routing Rules
There are three sections you can configure here:
Enrichment
Qualification
Meeting Distribution
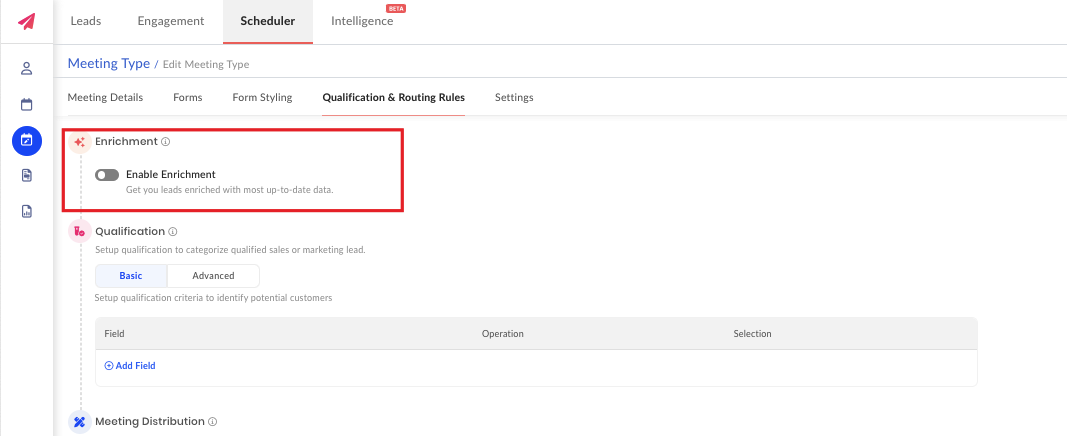
Enrichment
Enrichment allows you to gather more accurate and detailed information about the leads that sign up with you. By leveraging the latest data sources, Enrichment can help you identify and fill in missing details about your leads, allowing you to make more informed business decisions and drive better results.
Here’s how you can enable and configure enrichment for a meeting type:
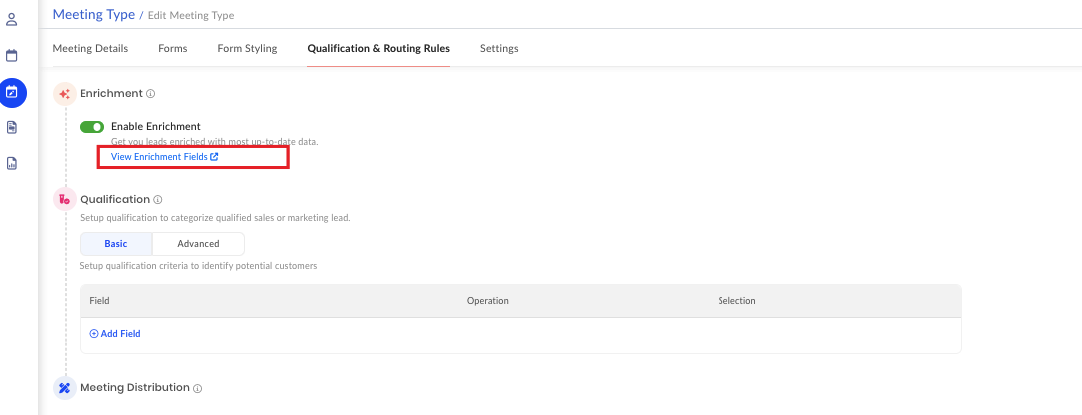
Navigate to the Enrichment section and enable the toggle for Enable Enrichment.
Click the View Enrichment Fields button.
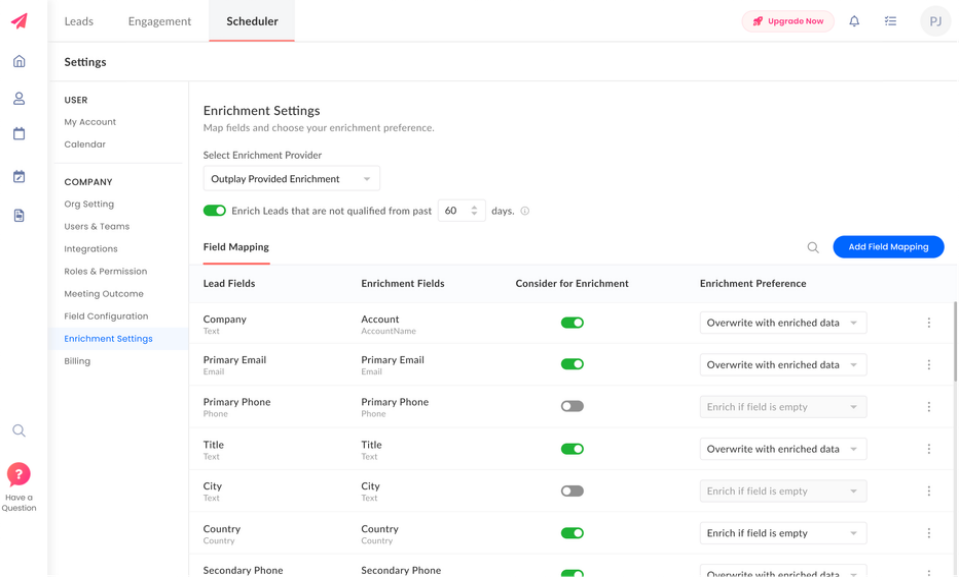
You are redirected to the Enrichment Settings page. Here, you can view all the mappings associated with enrichment.
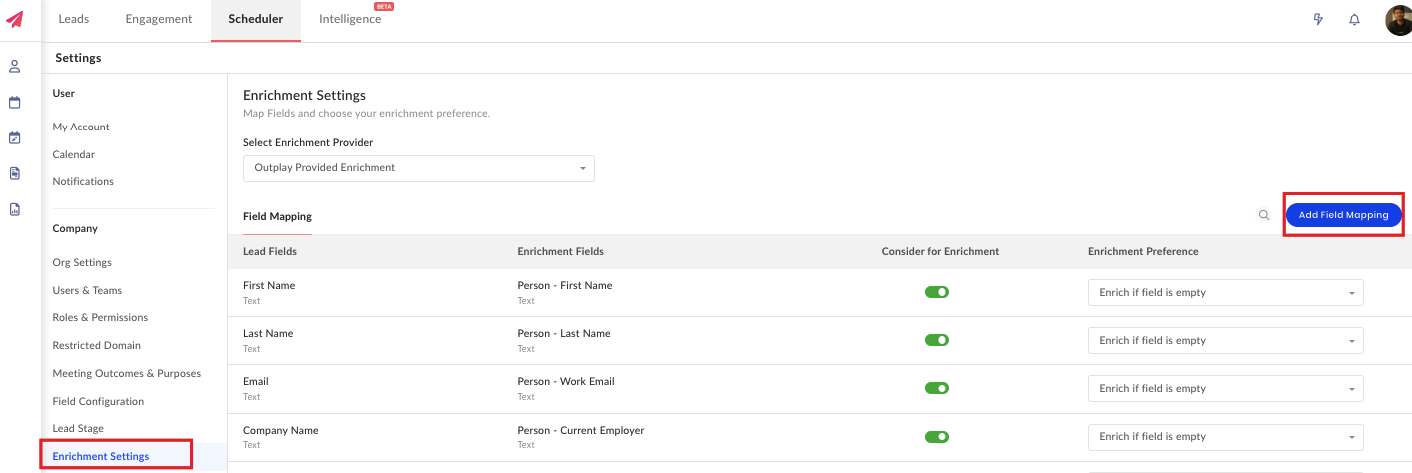
Select an Enrichment Provider of your choice.
Next, you can create a mapping of your choice. Click the Add Field Mapping button.
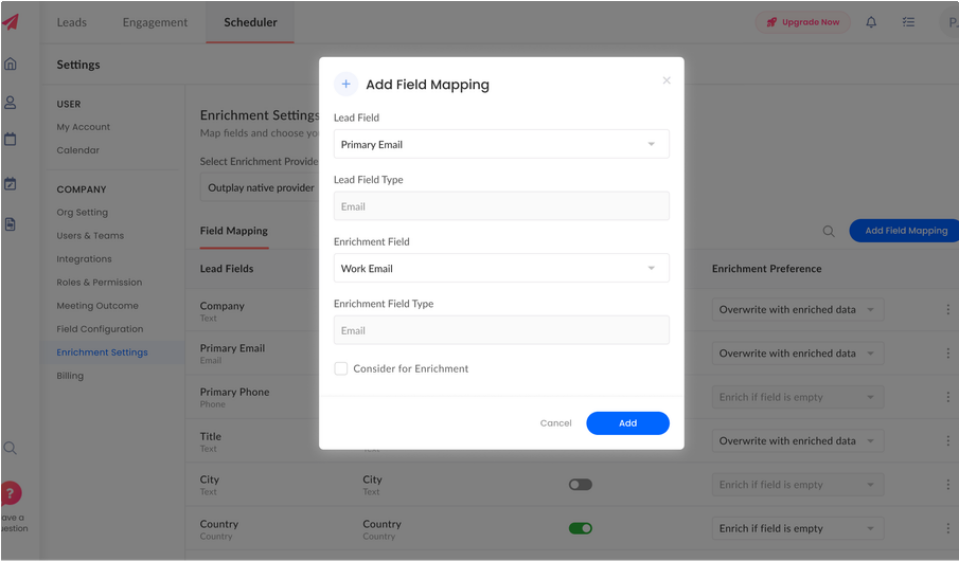
The Add Field Mapping window pops up. Here, you can complete the fields as required:
Lead Field: Select the Outplay field that has to be enriched.
Enrichment Field: Select the corresponding field within the enrichment provider to gather additional information about the lead.
Consider for Enrichment: Enable the toggle to activate enrichment for the field.
Click Save. The enrichment mapping is created successfully.
You can enable/ disable the Consider for Enrichment toggle for any mapping configuration.
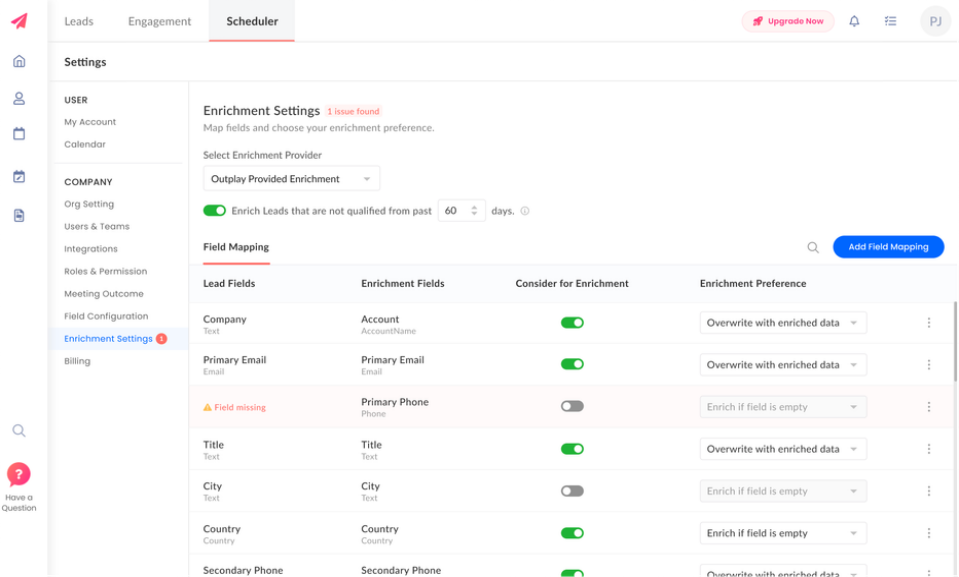
Under Enrichment Preference for each mapping, you can select either of the two options:
Enrich if the field is empty
Overwrite with enriched data

The enrichment mapping has been created and configured successfully. You can now proceed with creating your meeting type.
Qualification
By creating a qualification funnel, you can effectively identify the most qualified leads for your sales or marketing efforts. This involves setting up a system of qualification that categorizes leads based on a range of criteria. By doing this, you can focus your resources and efforts on the leads that are most likely to convert, while also providing a more tailored and personalized experience for each lead.
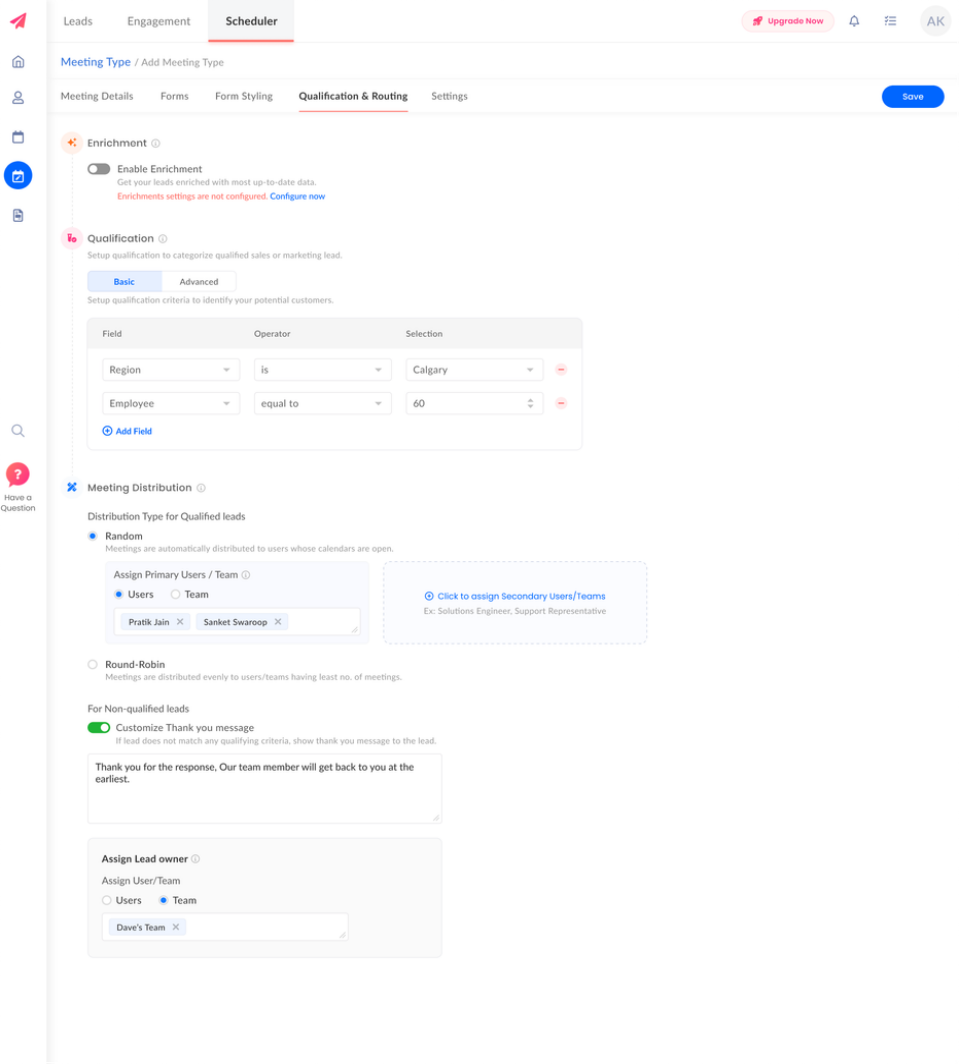
Basic Qualification
Using Basic Qualification, you can establish qualifying rules for each lead field. You can select the specific Outplay field you want to work with, and choose from qualifying measures such as "Equal To", "Contains", or "Starts With". Once you've selected the appropriate measure, you can enter a qualifying value that will help you identify leads that meet your criteria.
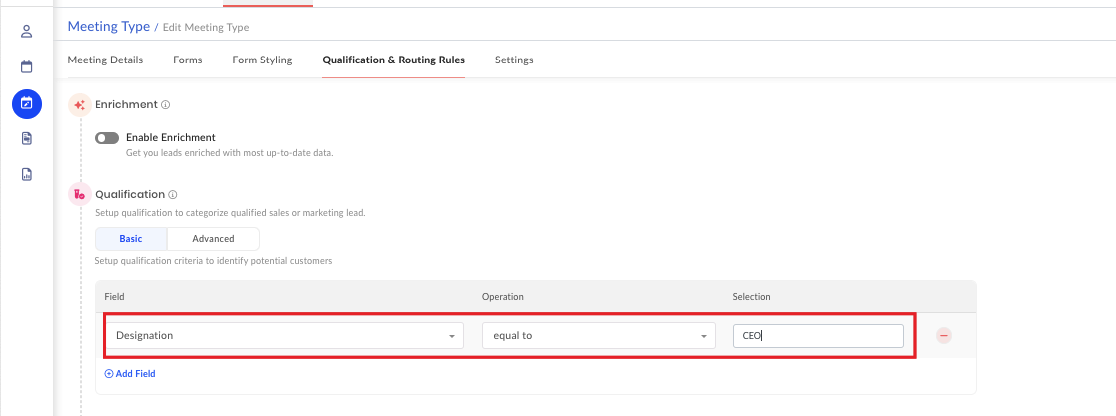
For instance, if you've chosen to qualify leads based on their job title, you might set up a rule that specifies "Equal To" and enter "CEO" as the qualifying value. By utilizing these rules, you can better segment your leads and improve your outreach efforts, ultimately increasing the efficiency and effectiveness of your lead generation and qualification processes.
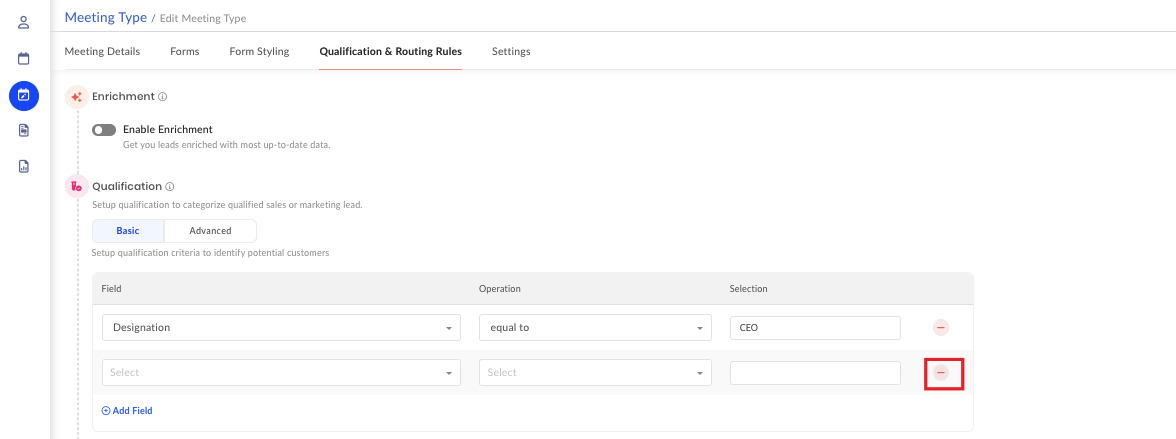
Click the Add Field button.
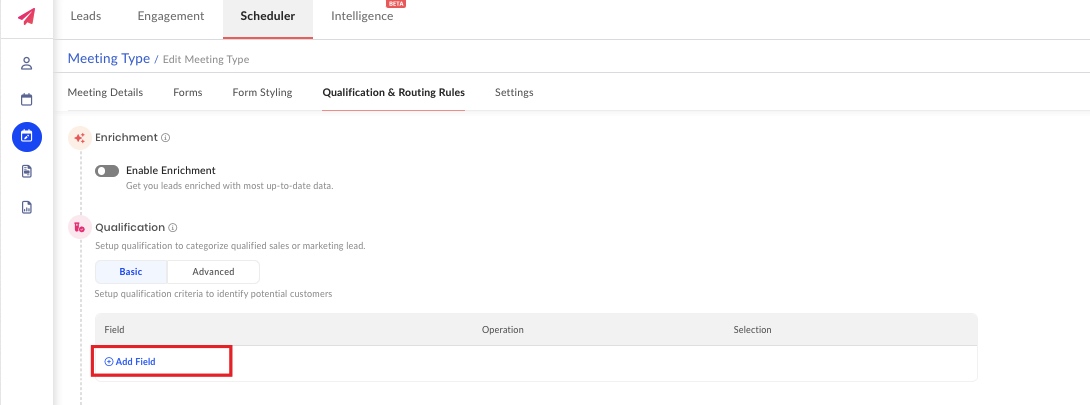
The Add Field section is displayed. You can complete the fields as required:
Field: Select the Outplay field that you want to use as a basis for qualification.
Operation: Select the type of qualifying measure you want to use for the selected field. There are several different types of qualifying measures you can choose from, such as "Equal To", "Contains", or "Starts With".
Selection: Enter the value based on the qualifying measure you've selected in the field. For example, if you've selected "Equal To" and the "Job Title" field, you might enter "CEO" as the value you want to qualify for.
Click the Add Field button to add another qualification rule.
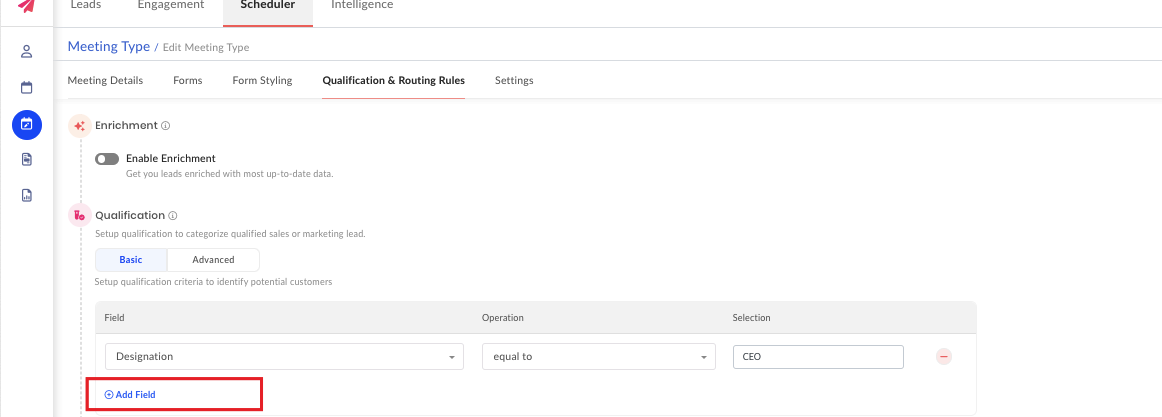
TIP: You can remove a qualification rule by clicking the Delete button.
NOTE: When multiple qualifying fields are applicable for lead qualification, all the corresponding qualifying rules must be satisfied in order for the lead to be considered qualified. In other words, meeting just one of the criteria is not enough to qualify a lead.
Advanced Qualification
Advanced qualification enables you to set up comprehensive rules and scores for each criterion, allowing you to assess the overall quality of a lead. Based on their total score, you can then assign the lead a tag, such as "Sales Accepted Lead", "Sales Qualified Lead", "Marketing Qualified Lead", or your own custom tag.
By categorizing leads in this way, you can ensure that your sales and marketing teams are focusing their resources on the most promising leads, and tailoring their efforts to meet their specific needs and interests.
Click the Advanced tab.
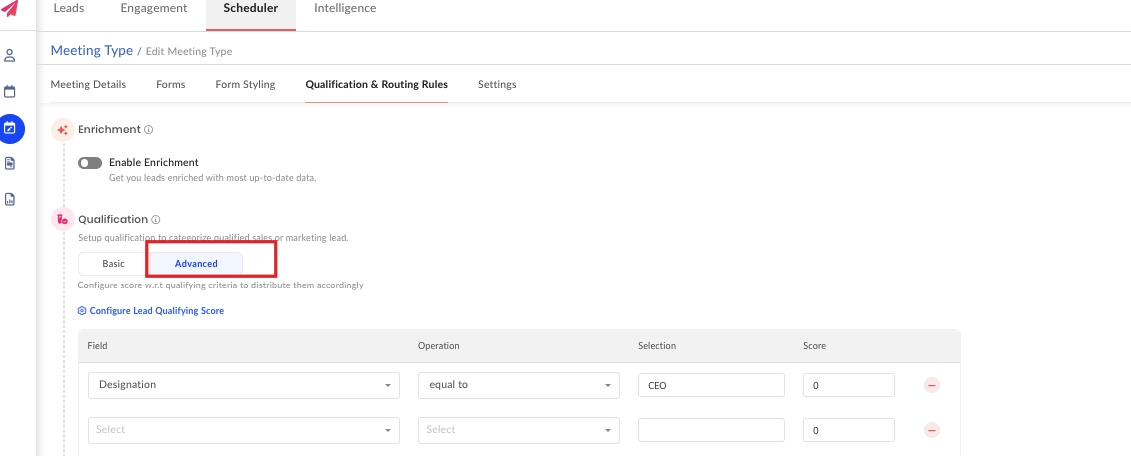
The Lead Qualifying Rule section is displayed. You can complete the fields as required:
Field: Select the Outplay field that you want to use as a basis for qualification.
Operation: Select the type of qualifying measure you want to use for the selected field. There are several different types of qualifying measures you can choose from, such as "Equal To", "Contains", or "Starts With".
Selection: Enter the value based on the qualifying measure you've selected in the field. For example, if you've selected "Equal To" and the "Job Title" field, you might enter "CEO" as the value you want to qualify for.
Score: Enter a suitable score that the lead gains when they qualify.
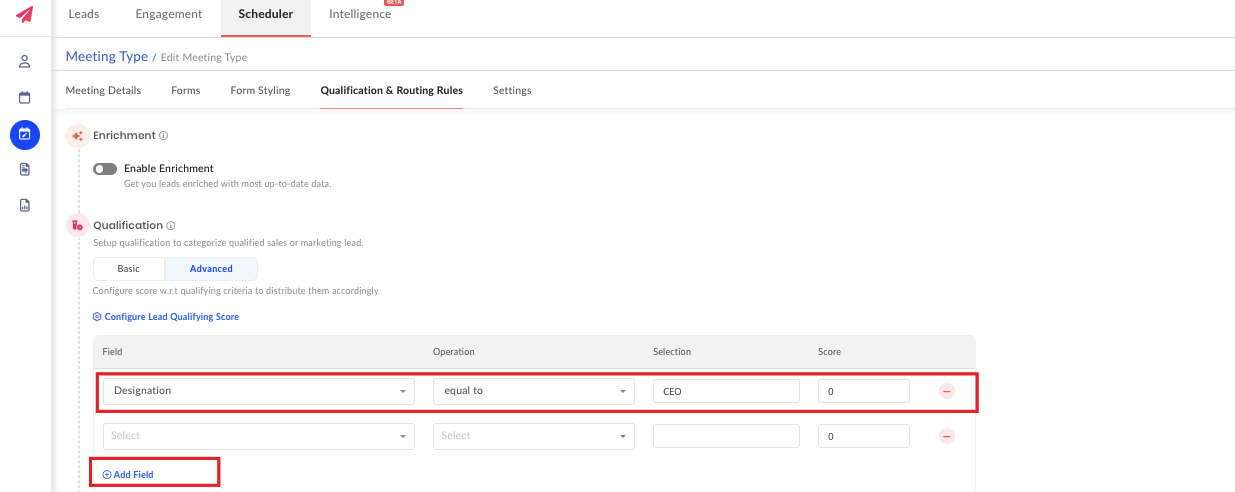
Click the Add Field button to add another qualification rule.
After adding all the qualification rules, click the Configure Lead Qualifying Score button.
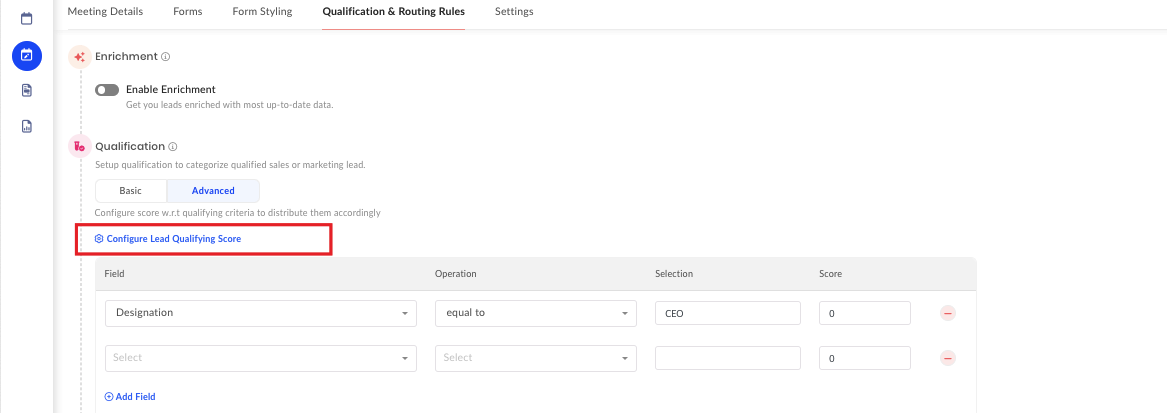
The Configure Lead Qualifying Score window pops up. Here, you can set the rule to tag the lead as per their overall qualifying score. For example, if the lead score is equal to 60 tag as Marketing Qualified.

Click the Add Custom Rule to add a custom rule and tag of your choice.
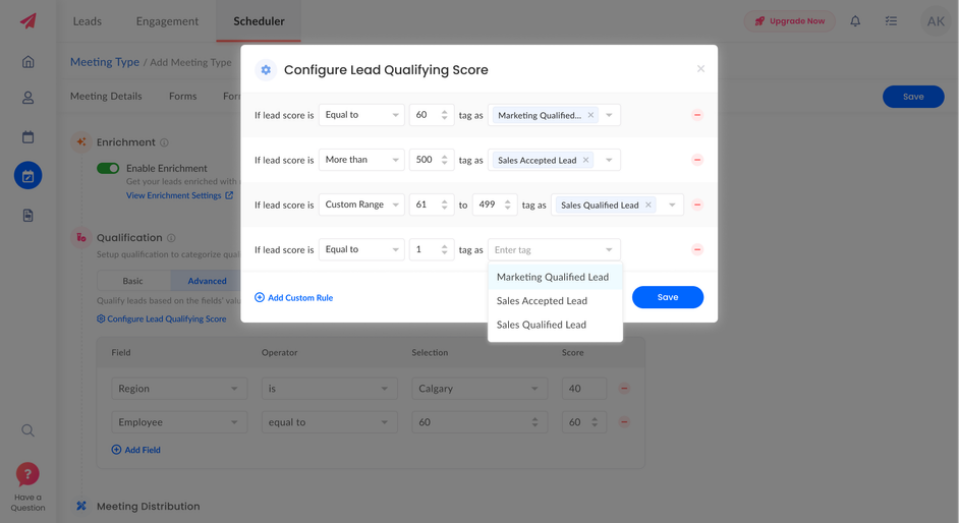
Click Save.
Meeting Distribution
Here, you can choose how your qualified leads can be distributed among users or teams. Under Meeting Distribution Type, you can choose Random or Round Robin.
Random Selection: When this option is selected, the meeting is assigned to a user or team whose calendar is open, in no particular order or criteria.
Select the checkbox for Random.
Select the checkbox for User or Team to assign qualified leads as per your preference.
Search and select the individual/ team.
Round Robin Selection: When this option is selected, the meeting is assigned to a user or team with the least number of meetings or based on availability.
Select the checkbox for Round Robin.
Select the checkbox for User or Team to assign qualified leads as per your preference.
Search and select for the individual/ team.
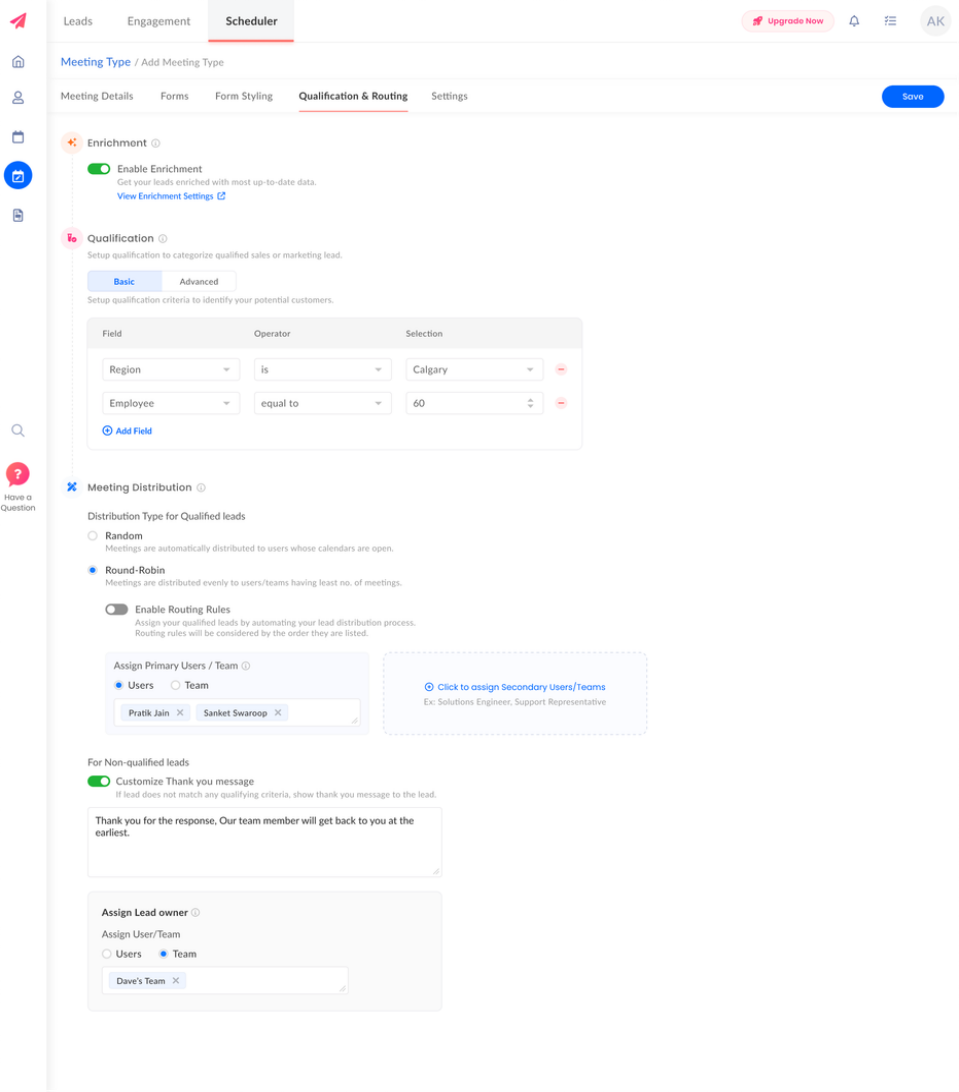
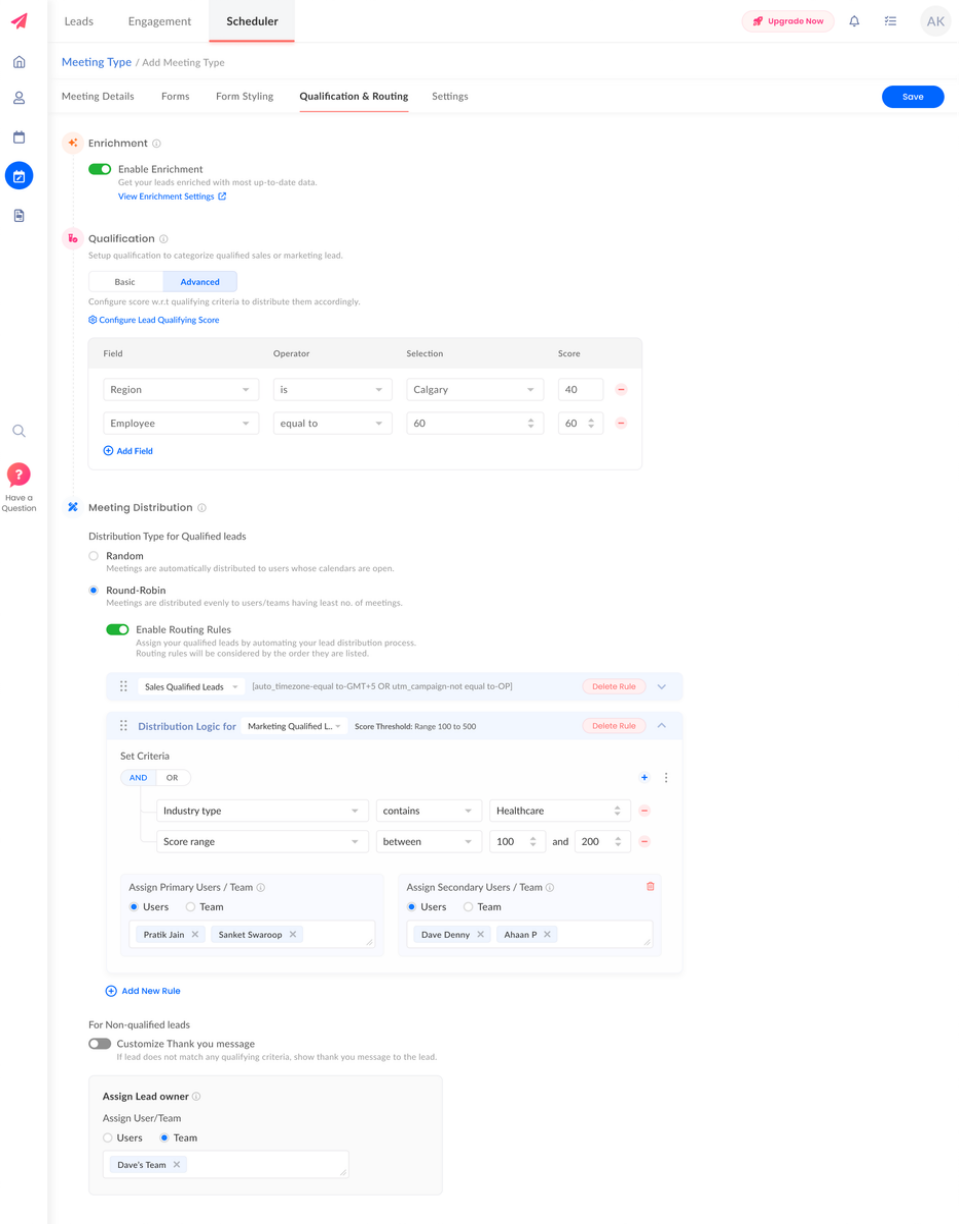
Enable Routing Rules for Round Robin Meeting Distribution: With this additional option selected for Round Robin, the meeting is assigned to a team member when the preset criteria are met. For example, you can set a rule where the email addresses containing @xyz.com can be routed to a specific user or team. You can also set the rule to assign leads of a specific qualifying score to be assigned to a user or team.
Enable the toggle for Enable Routing Rules.
For Distribution Logic, select which leads the rule should be applied to. You can select among Marketing Qualified, Sales Accepted, Sales Qualified, or choose to create a Custom Rule.
Select the Criteria as And/ Or.
Select the checkbox for User or Team and search for individual/ team to assign qualifying leads for the rule as per your preference.
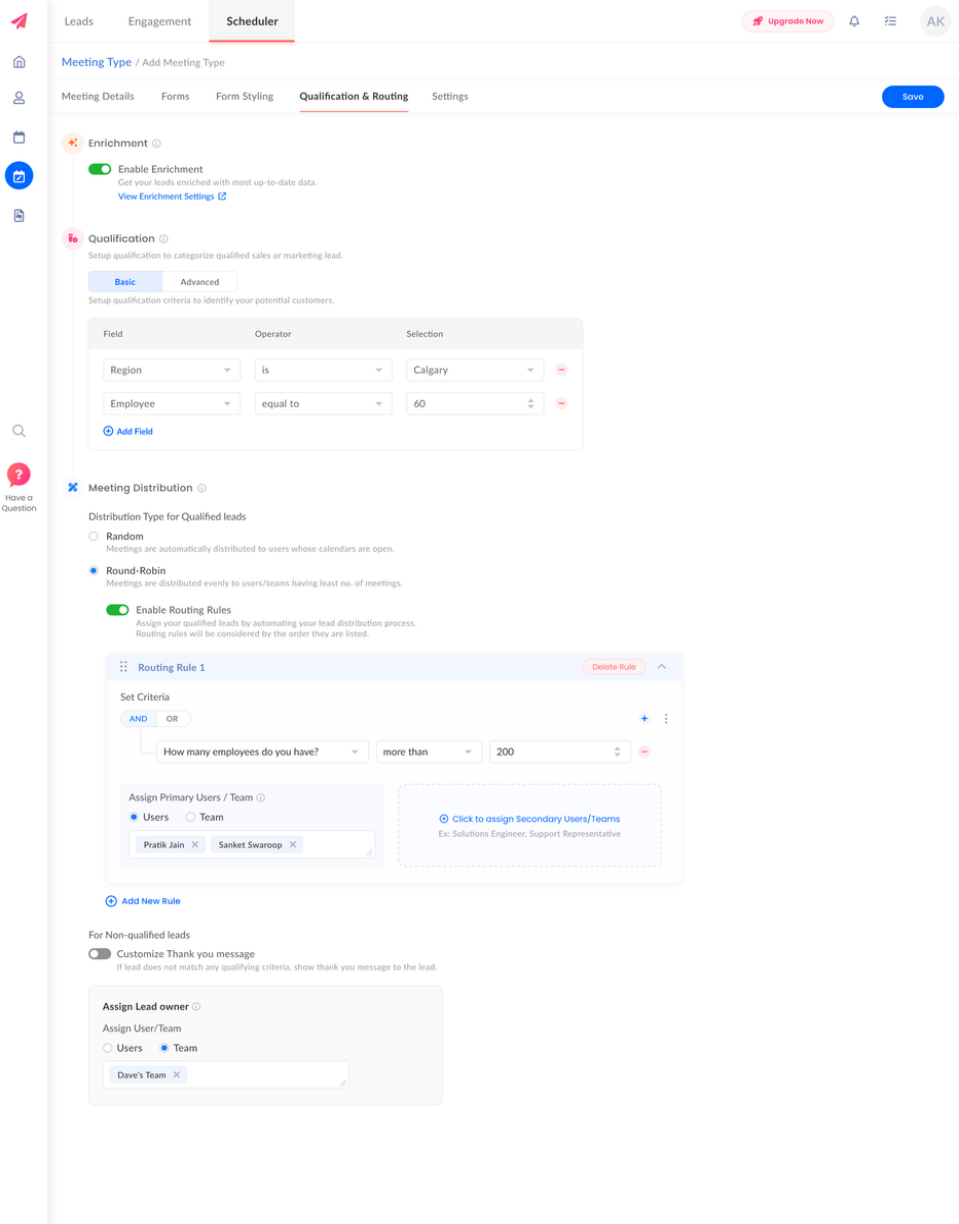
NOTE: You can assign a secondary user or team to your qualified leads as well.
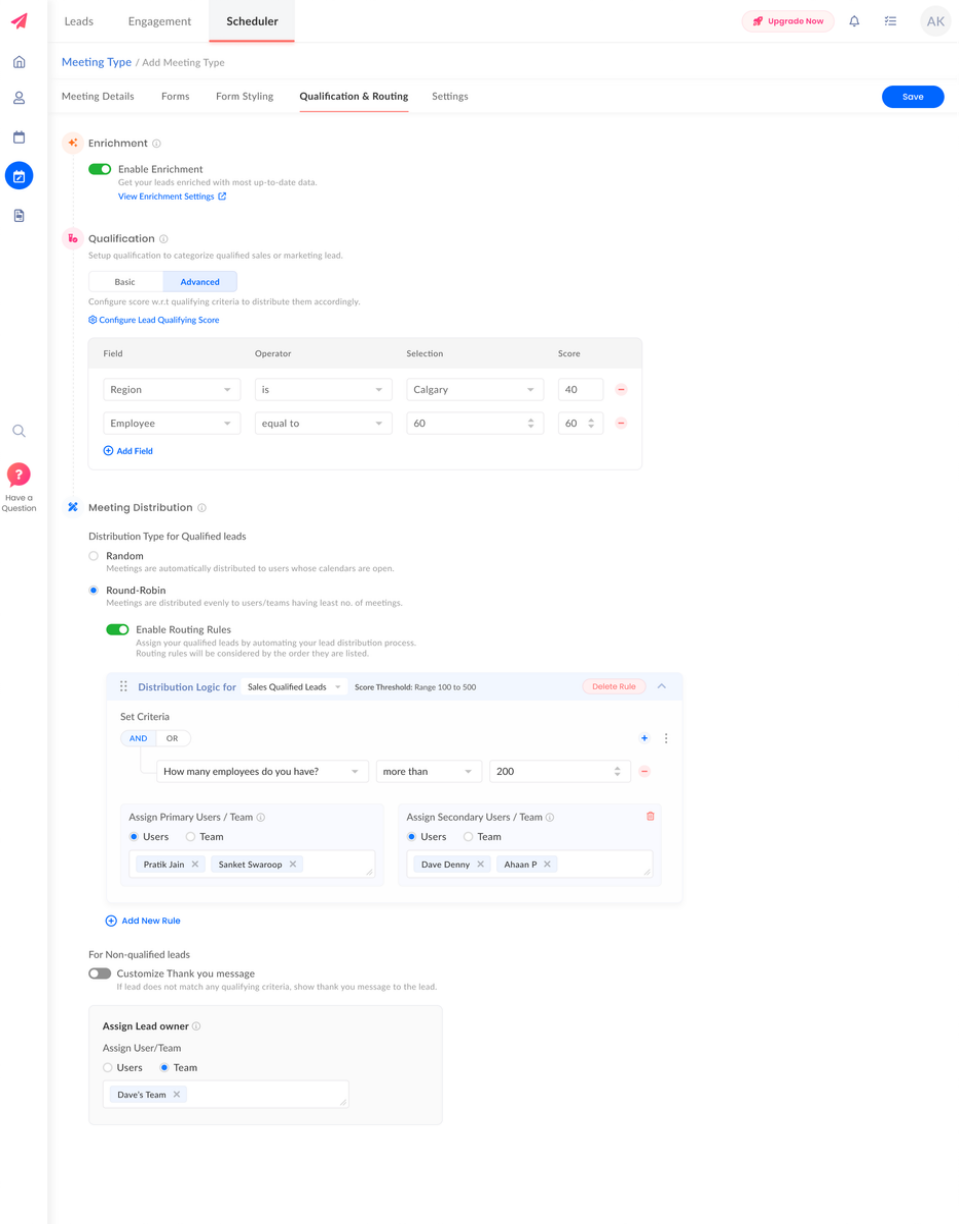
NOTE: If leads do not qualify for the Round Robin rules, you can assign those leads to a user/ team.
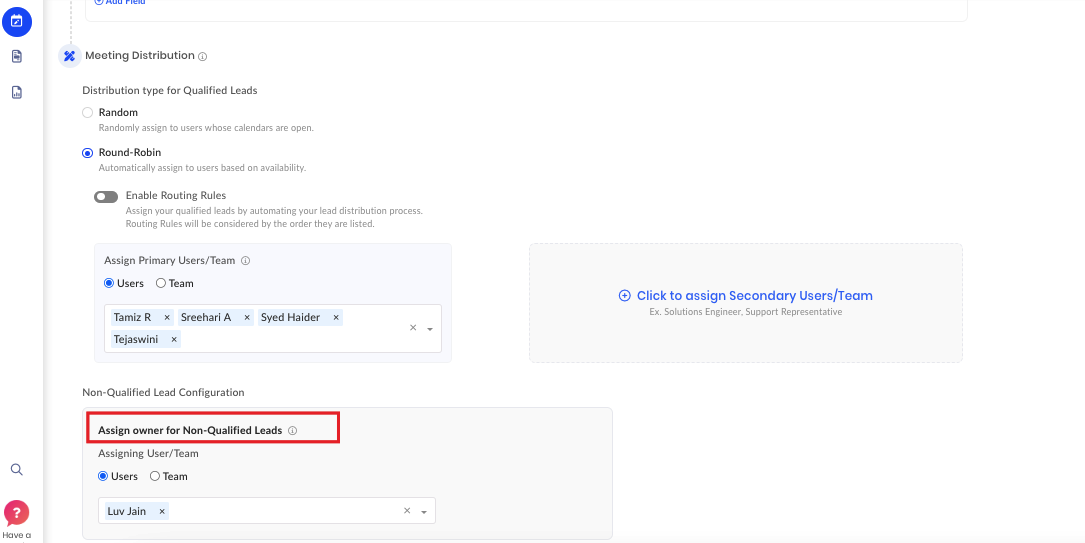
Non-Qualified Lead Configuration: When it comes to non-qualified leads, you can assign them to a user or a team of your choosing. However, no meetings will be scheduled for these leads. In the Non-Qualified Lead Configuration field, select the checkbox for User or Team and search for individual/ team to assign non-qualified leads as per your preference.
Customize Thank You Message: You can enable the toggle for Customize Thank You Message. In the box below, enter a personalized thank you message for the lead after they book a meeting with you.
Settings
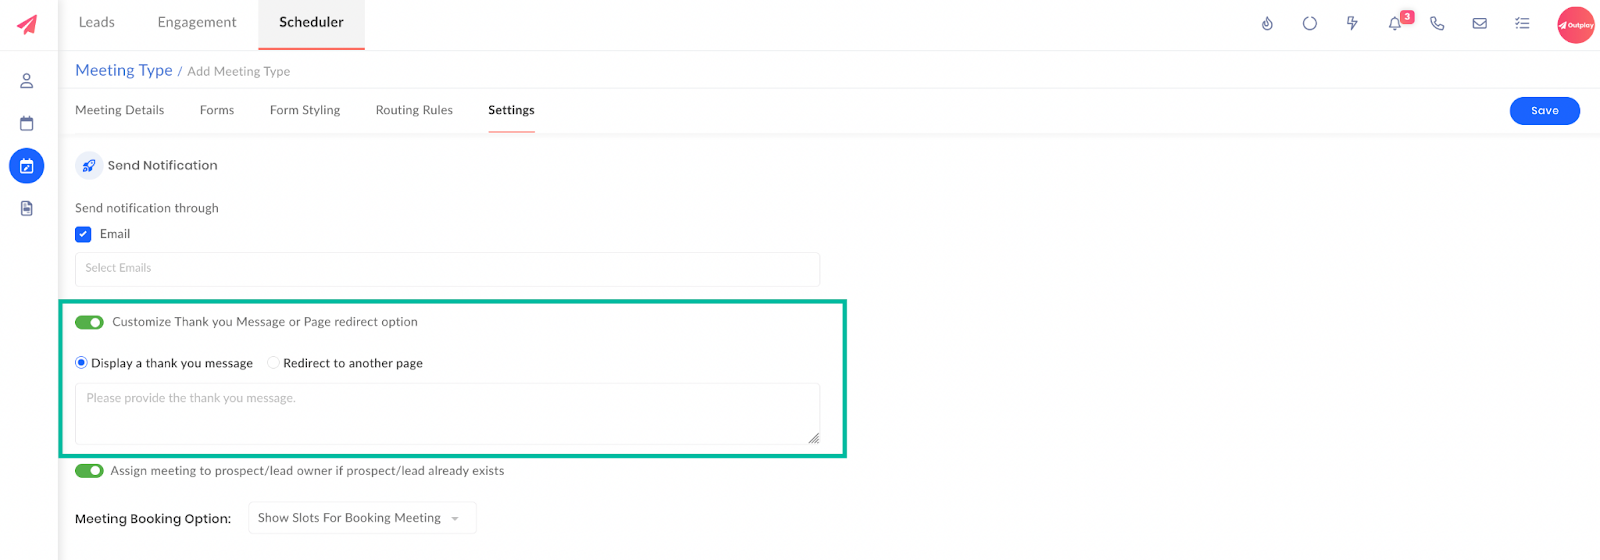
Under Settings, you can enable the checkbox to send an email or Slack notification to the lead for the meeting. You can select the mailbox or Slack account from which you want to send the reminder notification to the lead.
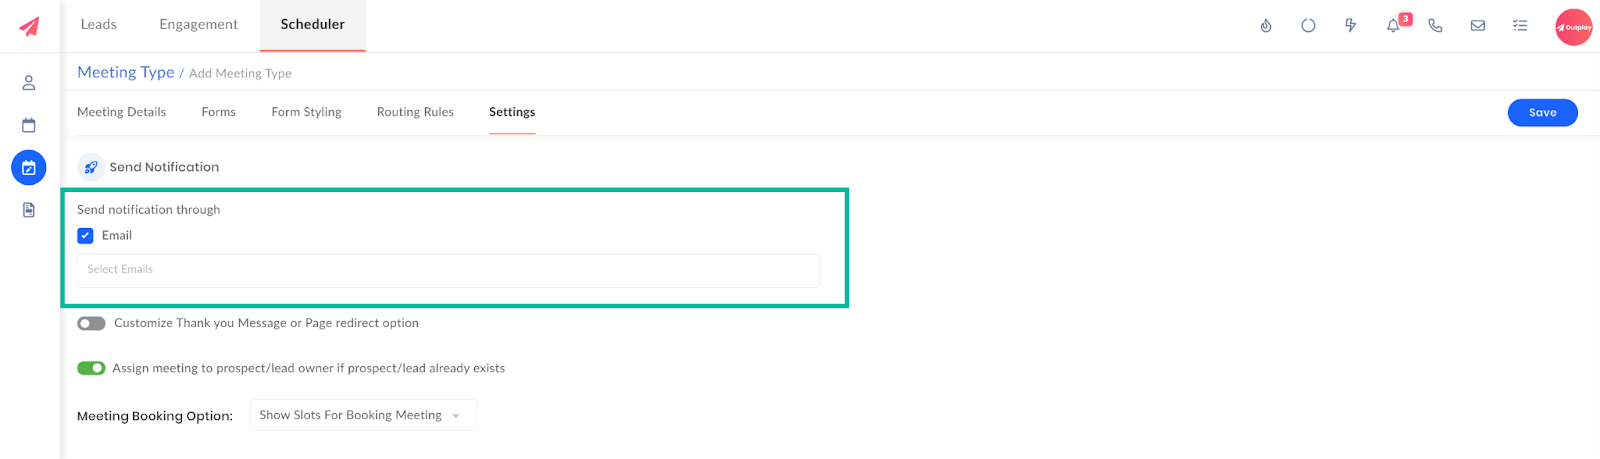
You can enable the toggle for Customize Thank you Message or Page Redirect option:
If you select the Display a Thank You Message option, you can display a personalized note for the lead after they book a meeting.
If you select the Page Redirect option, you can enter the URL for the page.
You can enable the following settings as well:
If you want to assign an existing prospect/ lead to its owner, you can enable the toggle for Assign meeting to prospect/lead owner if prospect/lead already exists.
If you want to add the leads you receive as prospects on Outplay, enable the toggle for Automatically convert the captured leads to prospects.
If you want to add a cancellation & reschedule link in the meeting description, you can enable the toggle for Add cancellation and rescheduling link in the meeting description.
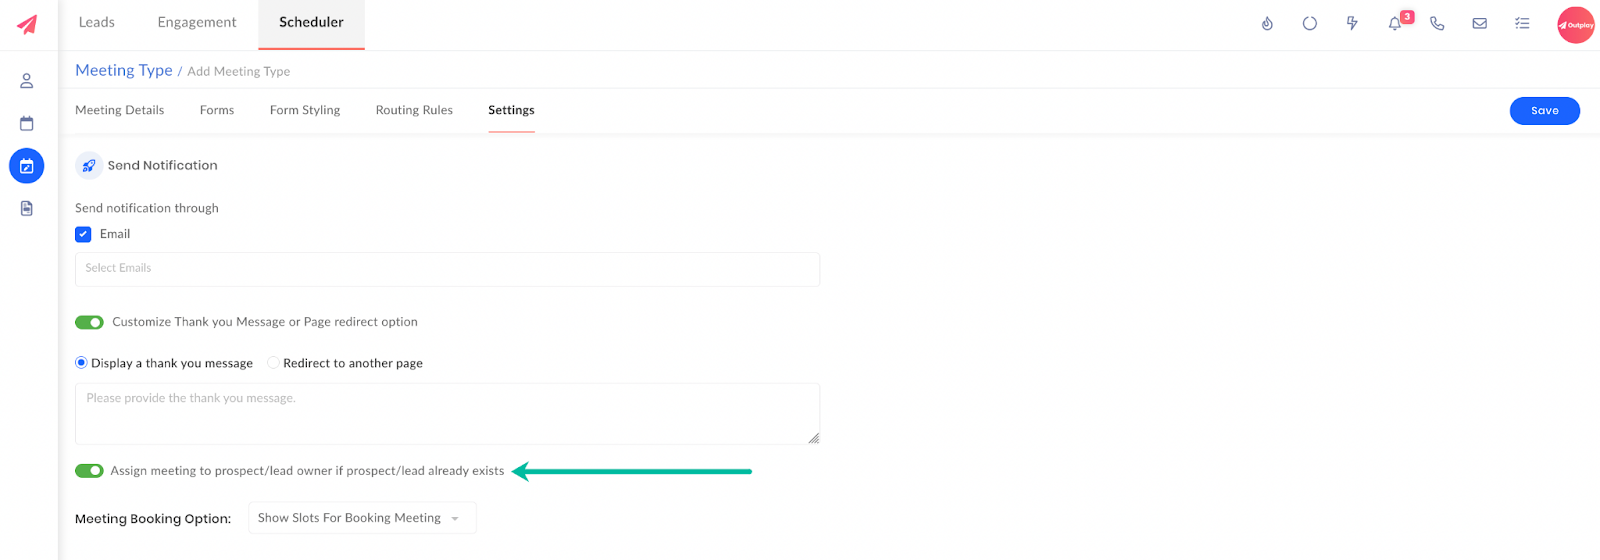
In the Meeting Booking Option, you can choose to display your available slots to the lead to book a meeting or manually book a meeting later.

After the essential fields have been filled and the options have been selected, click Save.

The Meeting Type is created and saved.
Updated on: 28/06/2024
Thank you!