How to create custom forms with Meeting Scheduler
Instantly qualify, route, and book meetings on the go!
Your lead is interested in what you have to offer and they want to book a meeting with you. You need to put your best man for the job forward and be well-prepared to tackle any query that’s unique to them. But how do you predict so much?
Through Forms on Outplay’s Meeting Scheduler! You can create custom forms that nudge your leads to submit relevant information about themselves. By analyzing the data, you can be prepared and route the meeting to the right salesperson who can undoubtedly close the deal.
Additionally, you can create forms that reflect your brand’s identity and style. Avoid going back and forth with leads and never miss out on the details!
Here’s how you can create custom forms with Meeting Scheduler:
- On Outplay, click the Scheduler tab on the top panel.

- The Inbound Leads page is displayed by default. Click the Forms option from the sidebar menu.

- Click Create Form.

- Under Create Form, you have two sections:
- Questions
- Form Styling

Set questions for your custom form
In this section, you can compose questions to understand your lead and their requirements better.
- In the Questions section, there are default fields that you can use for your form. These fields are Name, Email Address, Company and Phone.

- You can use the Move icon to arrange the flow of the questions on your form.

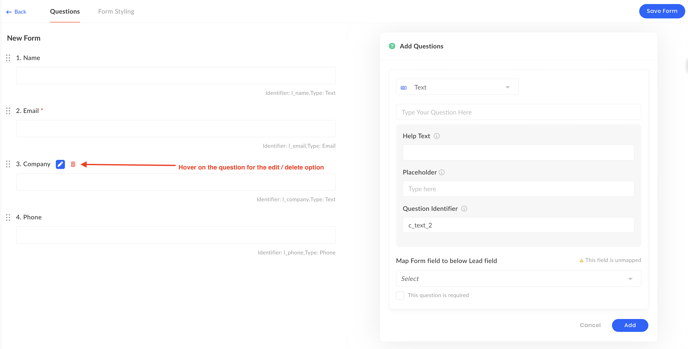
- You can find the Add Questions section to your right.
- Select the type of field you want to create on the form.
- Enter the question in the first field.
- In the Help Text field, you can enter tips to help the lead submit the right information.
- In the Placeholder field, you can enter directions, for example: Enter your email address here.
- In the Question Identifier field, you can enter a name/ identifier for the specific question. Question Identifiers come in handy while creating routing rules for a meeting type.
- Select the checkbox for This question is required if you want to set the question as mandatory to submit the form.
- Click Add.

NOTE: You can edit or delete default questions as per your requirement. Simply hover over the question to reveal the Edit & Delete option.
Style your form
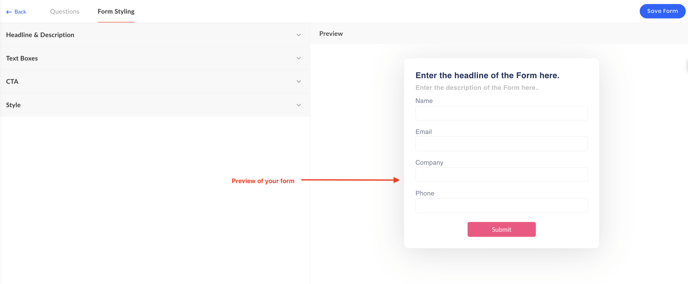
- Click the Form Styling tab. In this section, there are 4 components on the form that you can customize to match your brand style:
- Headline & Description
- Textboxes
- CTA
- Style

NOTE: Keep an eye on the Preview section to see how the form aligns with your brand style.
Headline & Description
In this section, you can define the purpose of your form by strategically composing the Headline and Description of your form.
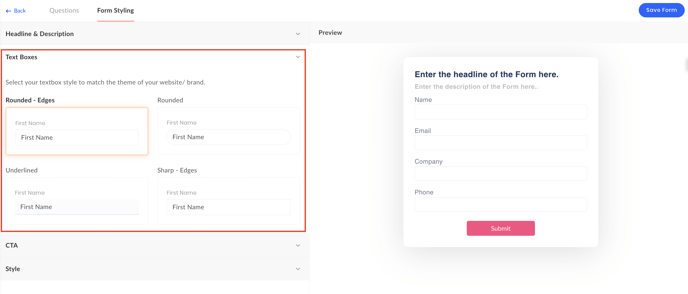
Textboxes
- You can choose the shape for your text boxes in this section. You can select between:
- Rounded - Edges
- * Rounded
- * Underlined
- * Sharp Edges
CTA
In this section, you can modify the Call To Action button on your form.
- You can enter the text for the CTA button in the CTA Display Text field. For example: Submit.
- Select the CTA button style to match the theme of your website or brand style. You can select between:
- * Rounded - Edges
- * Rounded
- * Sharp Edges
Style
You can play around with colors and fonts of elements on the form to match your brand style.
- Under Text Style, you can complete the fields as the table below:
- Under CTA Style, you can complete the fields as the table below:
- Click Save Form.
The custom form is created and saved.
Updated on: 28/06/2024
Thank you!