Integrate with Microsoft Dynamics 365
Integrate your Microsoft Dynamics CRM with Outplay
Engage prospects more efficiently and effectively than ever.
The Outplay - Microsoft Dynamics 365 integration is native and bi-directional, which means that you can send data from Outplay to Dynamics 365, and vice-versa, without any third-party tools. This way, you can sync and update data on both platforms.
You can also have all your activities related to emails, call logs, notes, meeting logs, voicemails, and other engagements, synced from Outplay to Dynamics 365.
Step 1: Create an OAuth Application
To begin the Dynamics 365 and Outplay integration setup, you have to create an OAuth Application or use an existing OAuth Application within your Dynamics 365 instance.
Dynamics 365 requests this for the safe integration of apps. Hence, the OAuth application is required to securely provide the appropriate authorization level to the app you are integrating.
Log in to Microsoft Azure.

Click the hamburger menu icon on the top left corner and select Azure Active Directory.

From the side panel, click App Registrations.

Click New Registrations.

NOTE: If you have created an OAuth Application previously, you can click the title of the application to obtain the Client ID.
Enter the OAuth Application Name.

Select the Accounts in this organizational directory only (ABC only - Single tenant) option for Supported Account Types.

Click Register.

The Oauth Application registration is complete.
Step 2: Obtain Client ID and Client Secret
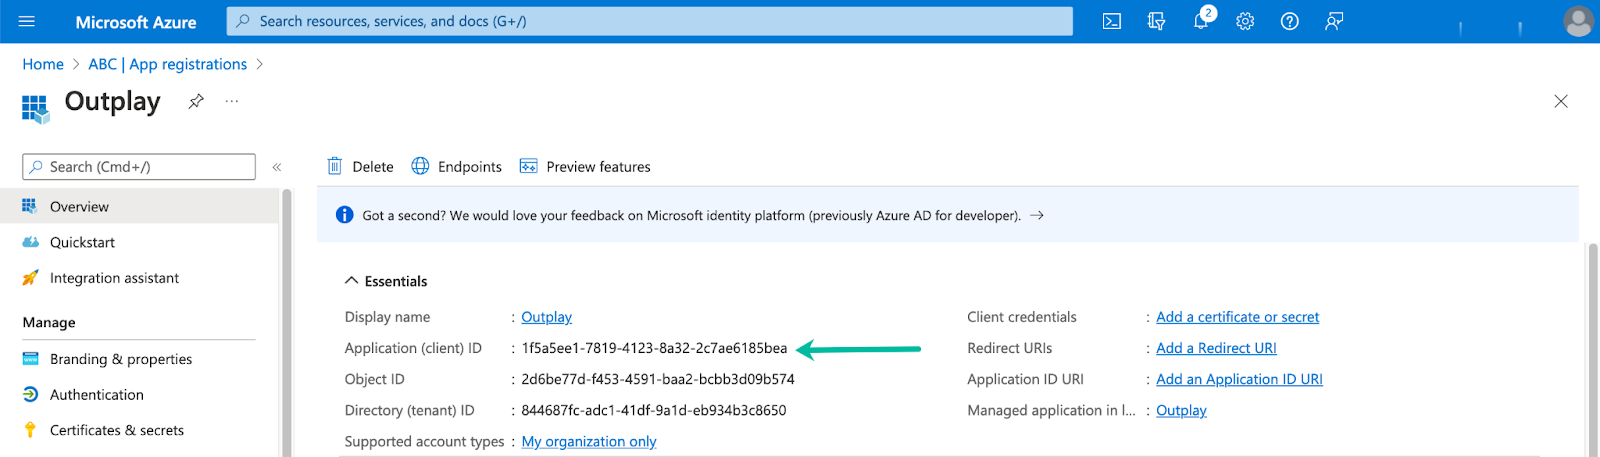
For Client ID:
Once Oauth Application registration is completed, you are taken to the Overview Page of the OAuth Application that you created.
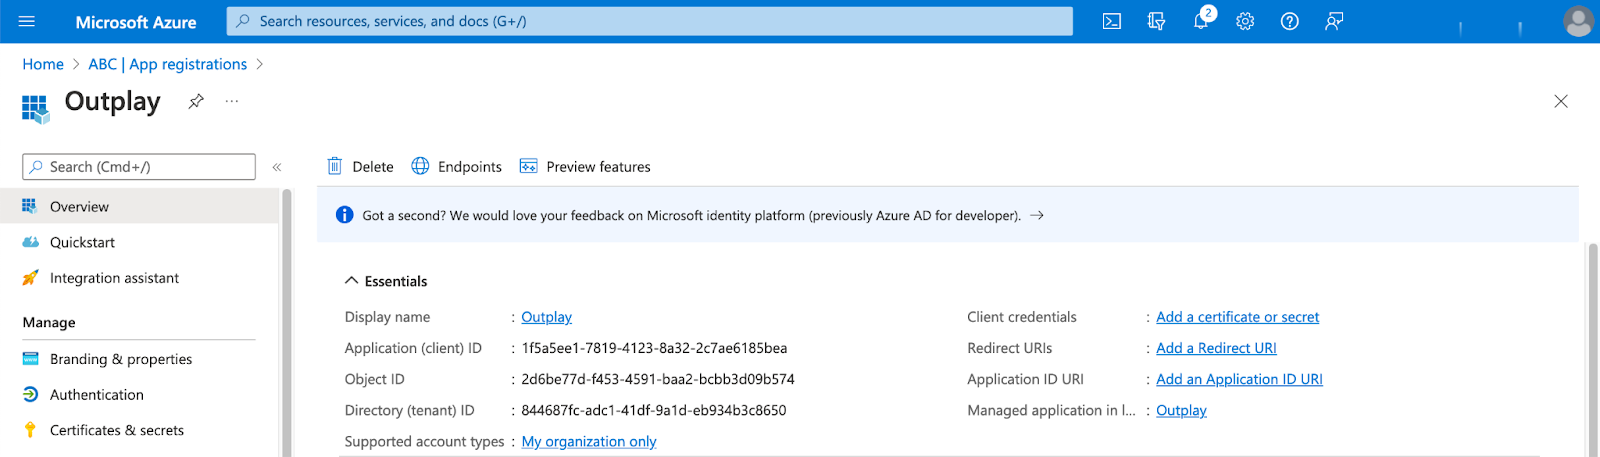
Copy the Application/ Client ID to a location on your system.
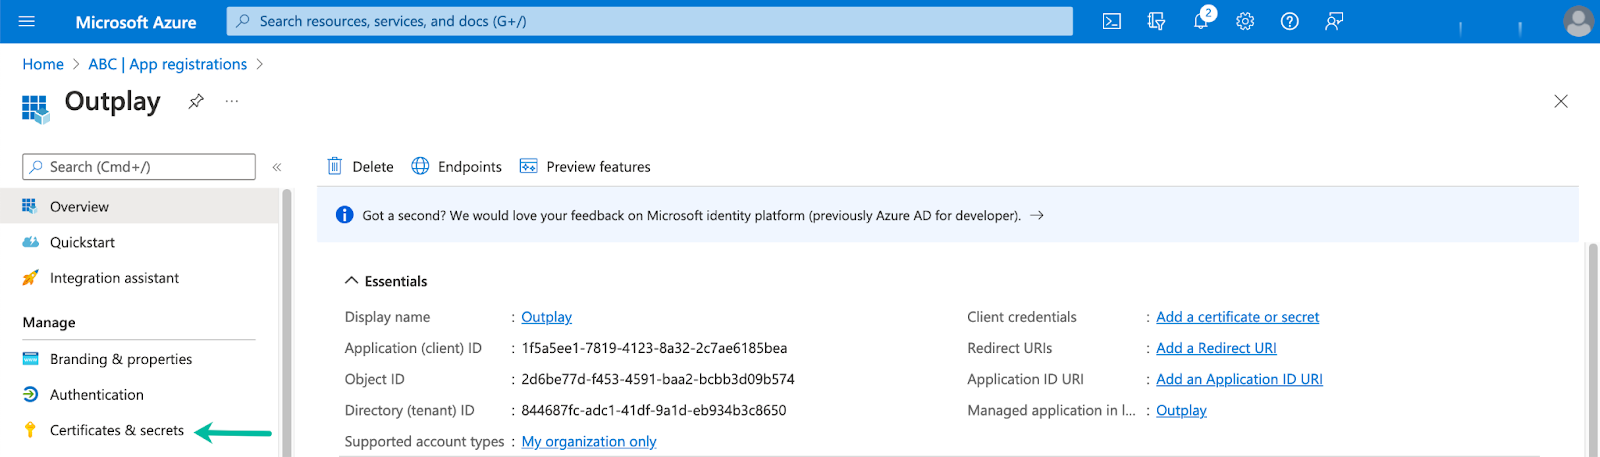
For Client Secret:
On the Overview page for the OAuth Application, click Certificates & Secrets on the sidebar menu.
Click New Client Secret under the Client Secrets section.
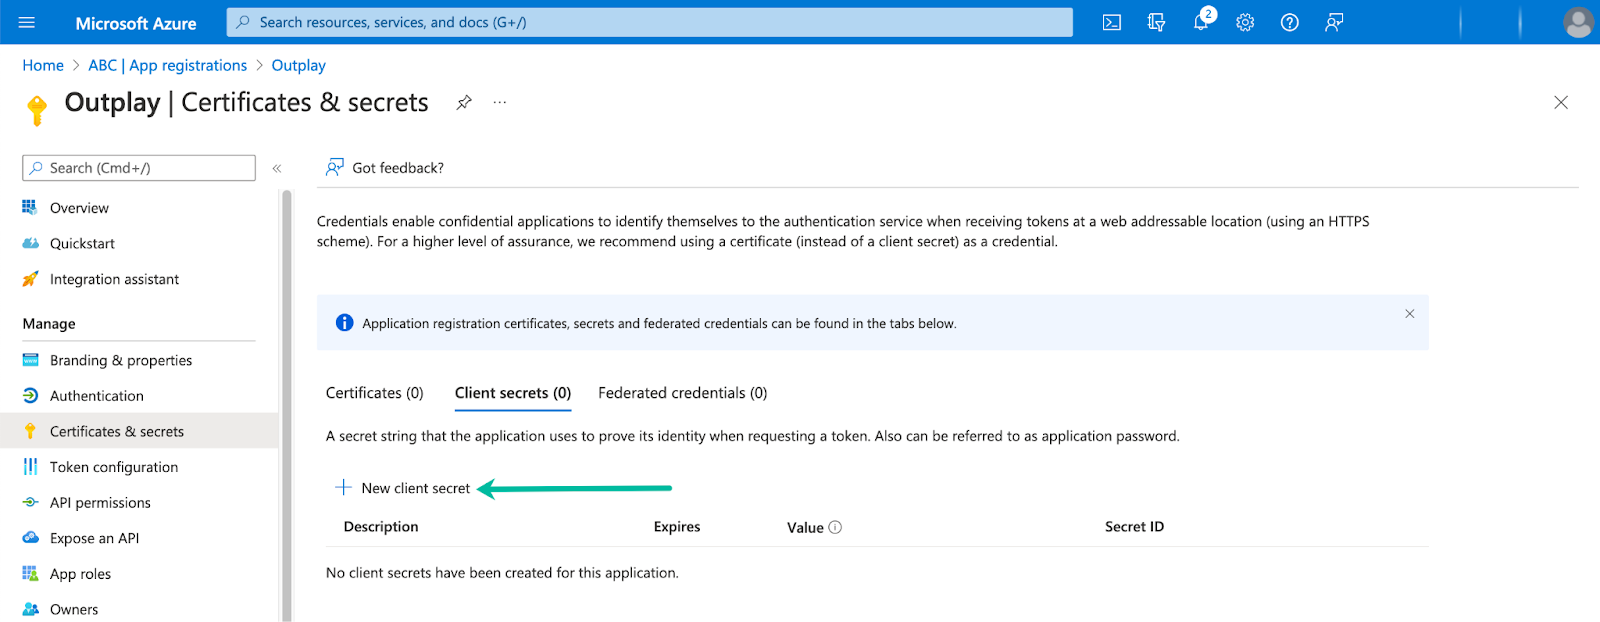
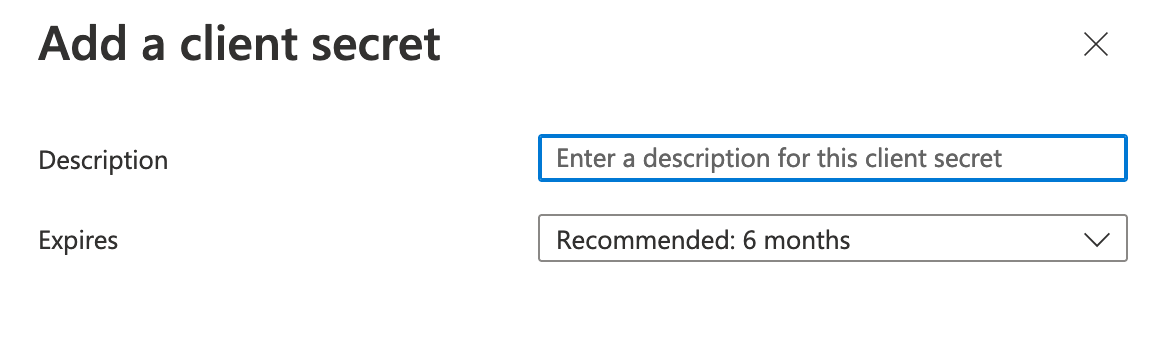
On the Add a Client Secret pop-up, you can enter a description for Client Secret (Ex: Outplay Client Secret) and select a time frame for your Outplay Client Secret to expire. You may select an expiry date as far into the future as you can. Click the Add button.
NOTE: Upon expiration, you can create a new secret on Dynamics and update it on Outplay for the integration to continue syncing.
Now, you can find a value associated with the new Client Secret you created. Click the document icon to copy the Value and Secret ID to a location on your system.
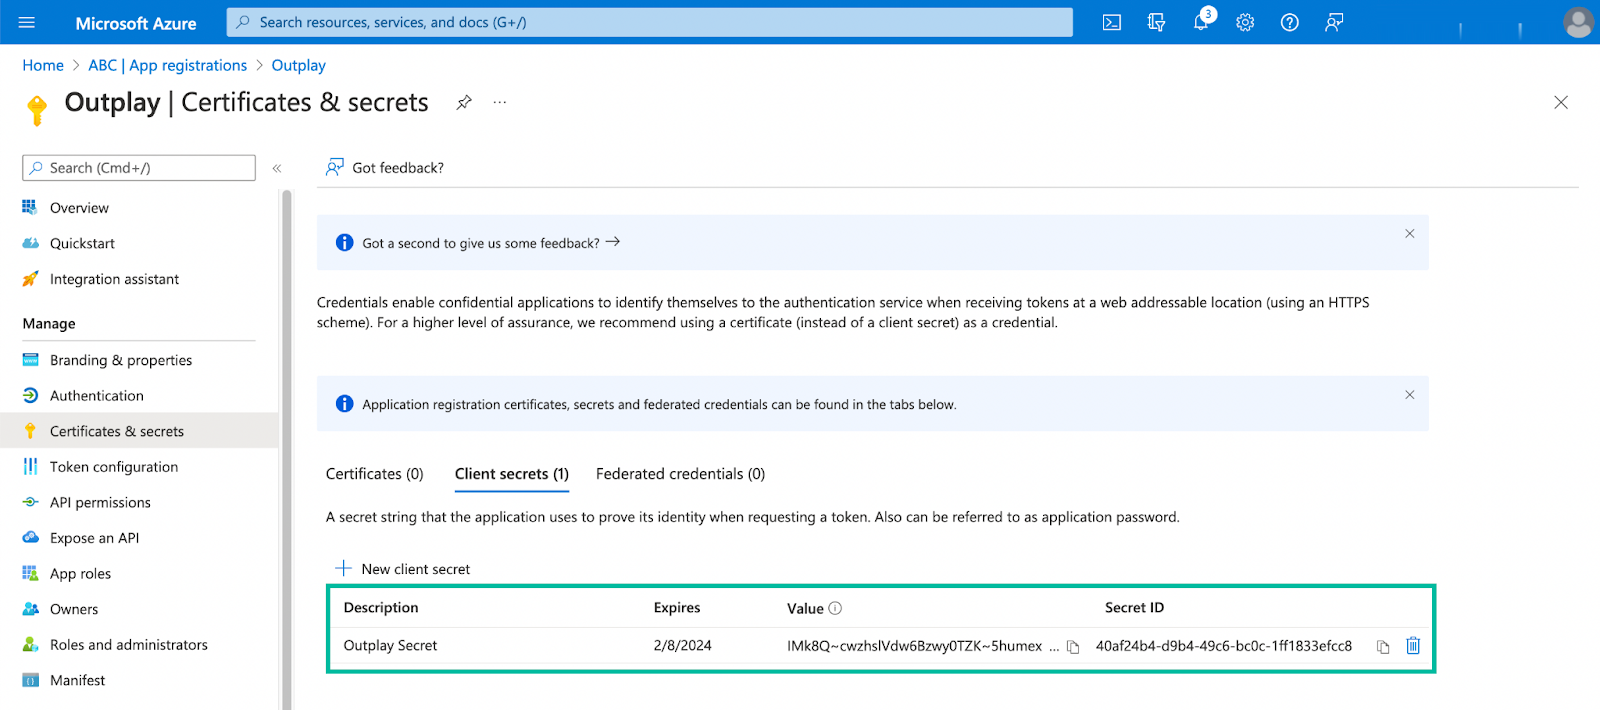
Note: This is the only time the Secret will be visible. If you do not copy the Secret to a location in your system at this stage, you may have to create a new one.
Step 3: Integrate Client ID with Microsoft Dynamics account
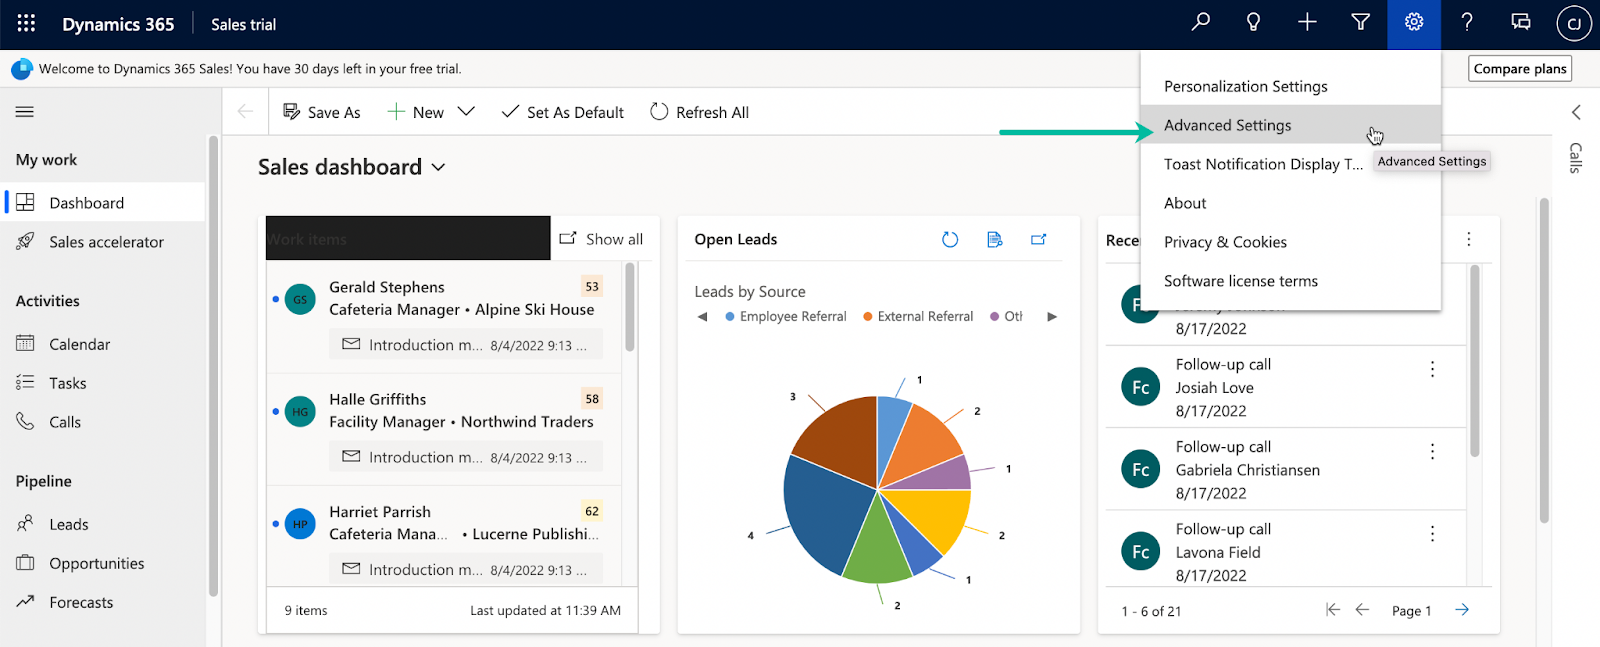
On Dynamics 365, navigate to Settings → Advanced Settings.
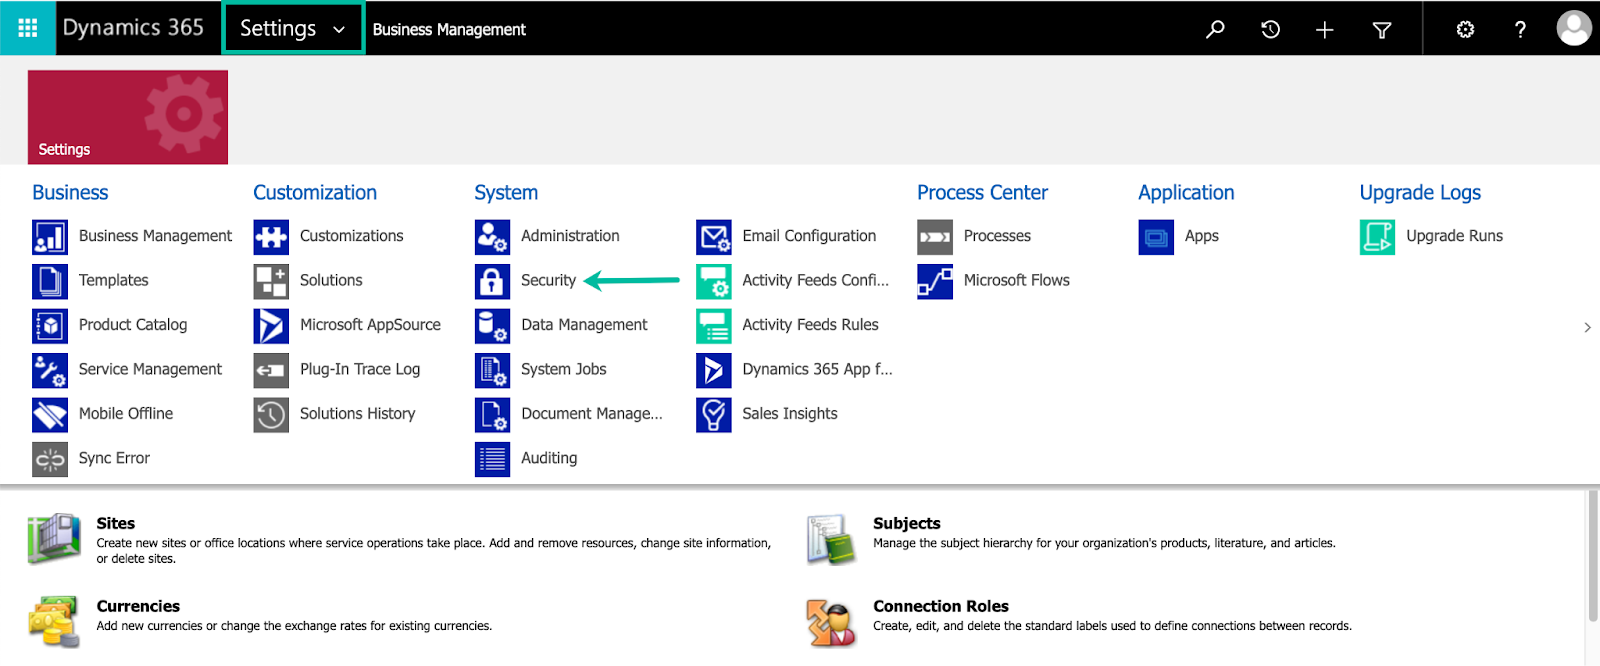
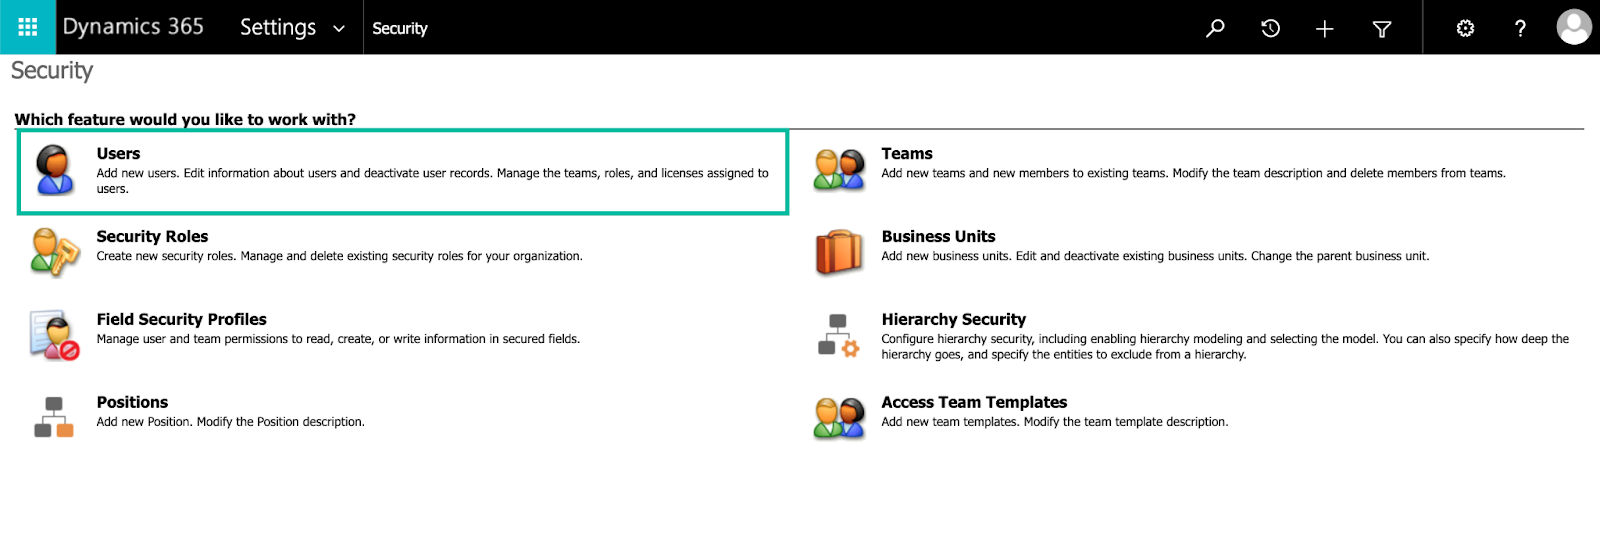
Expand the Settings menu and select Security.
Click Users.
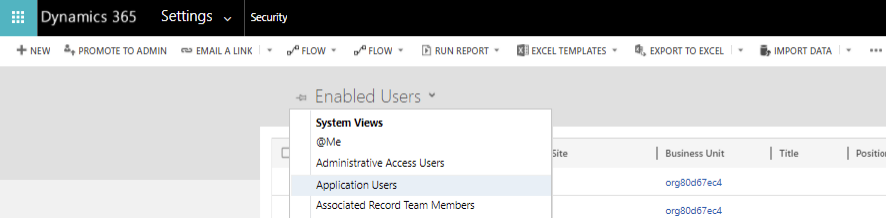
Click and select Application Users from the view.
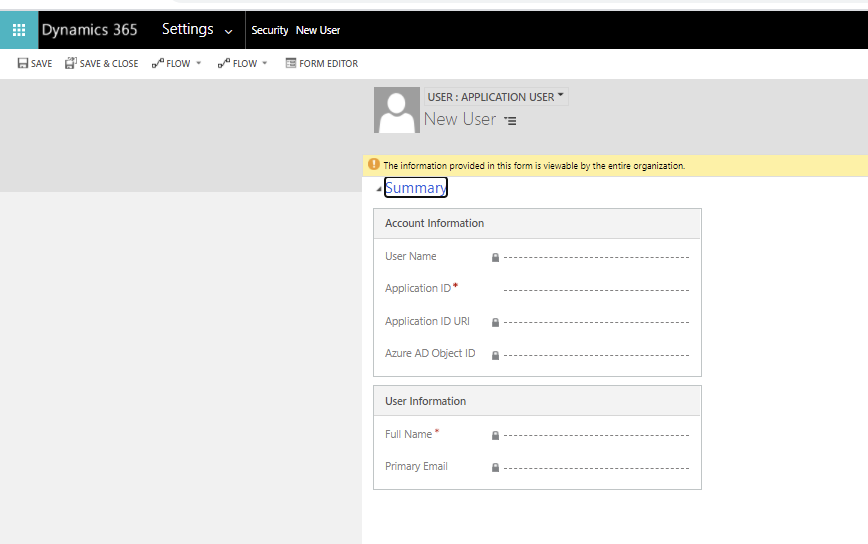
You can enter the Application ID (Client ID) created in Step 2 and click Save and Close.
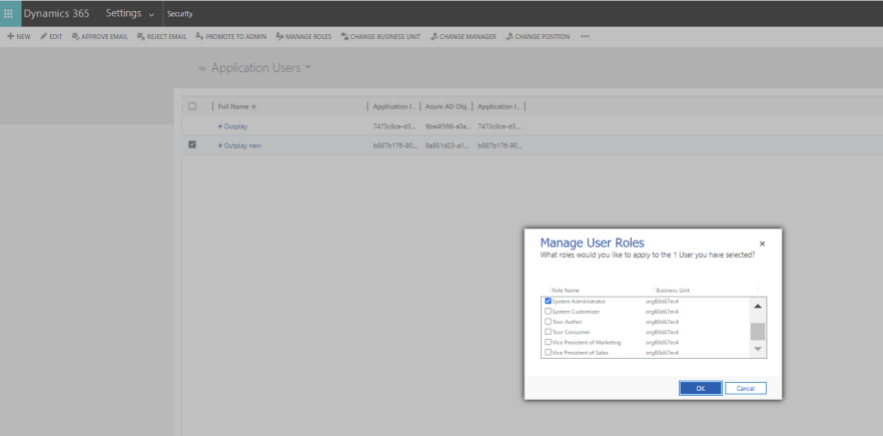
Select the Application User you just created and click Manage User Roles. Assign the "System Administrator" role to the application user.
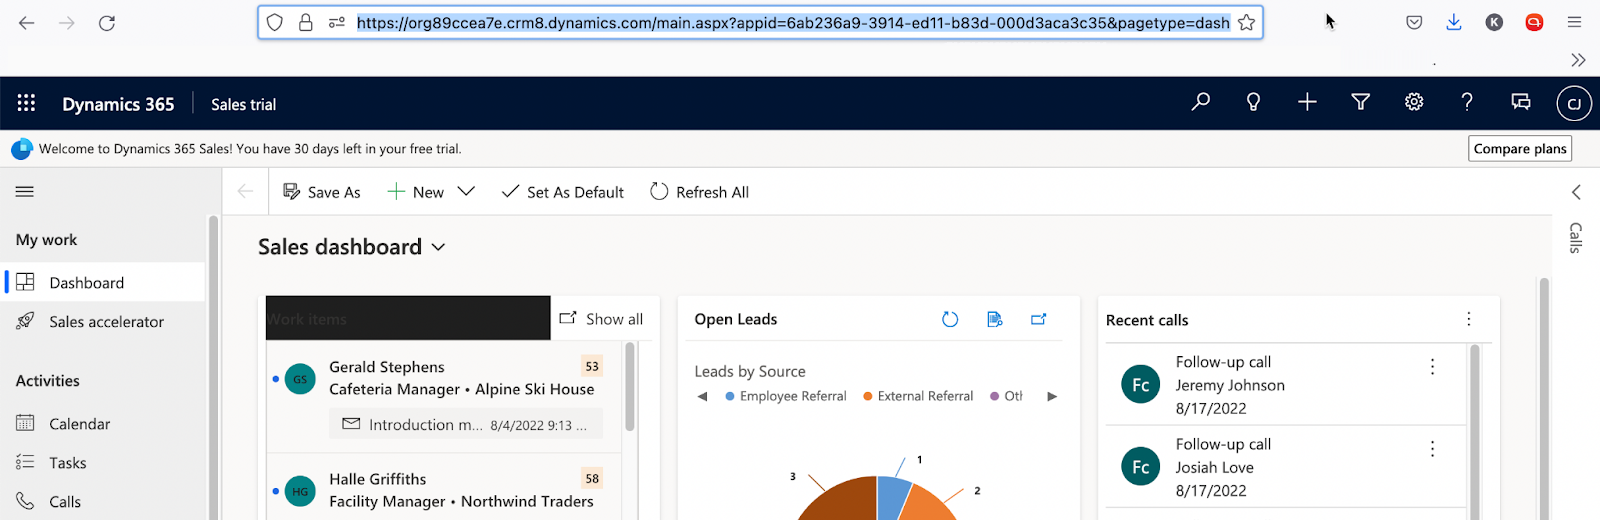
Step 4: Obtain your URL
On Microsoft Dynamics 365 Sales App, navigate to the URL in the browser and copy the "[https://xxxxxxxxxxxxxxxxxxx.com](https://xxxxxxxxxxxxxxxxxxx.com/)" including the "https://" and ".com" part from the main dashboard. Save it to a location on your system.
Step 5: Integrate Microsoft Dynamics 365 with Outplay
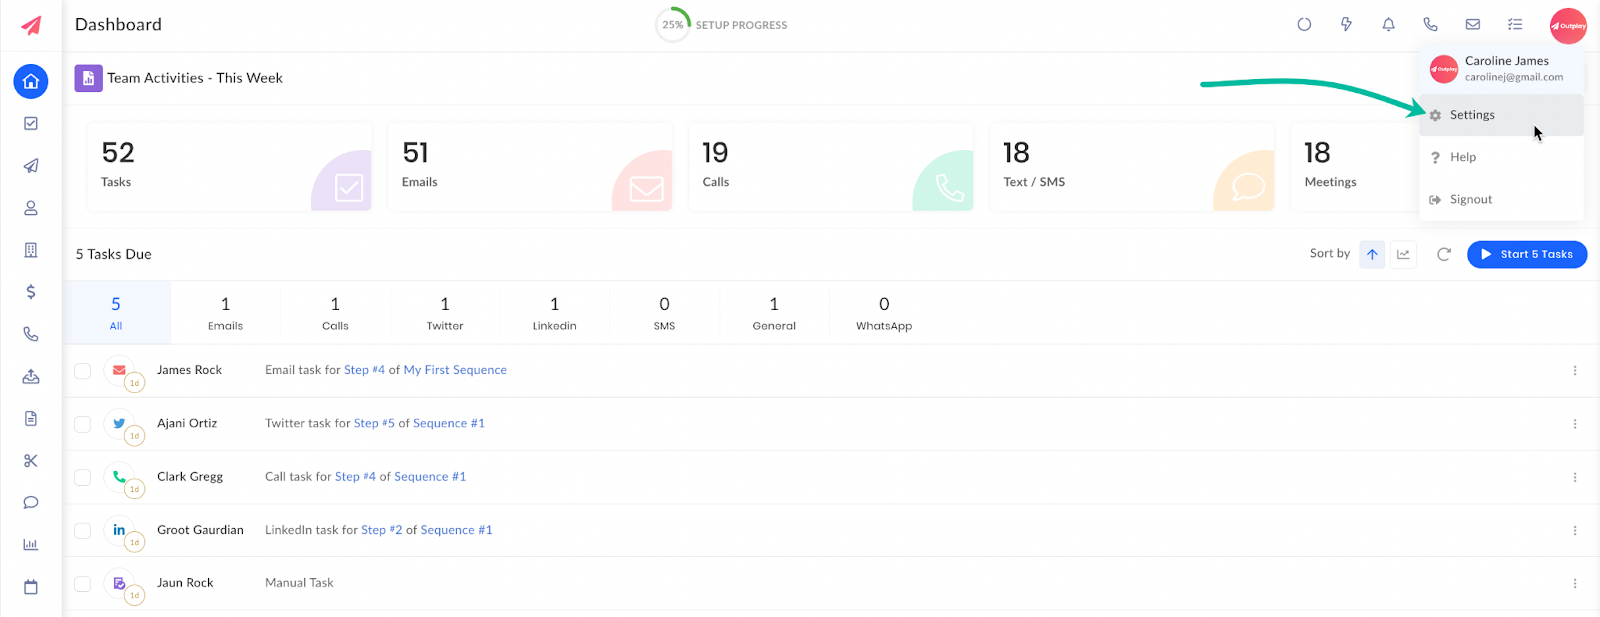
On Outplay, go to Profile → Settings.
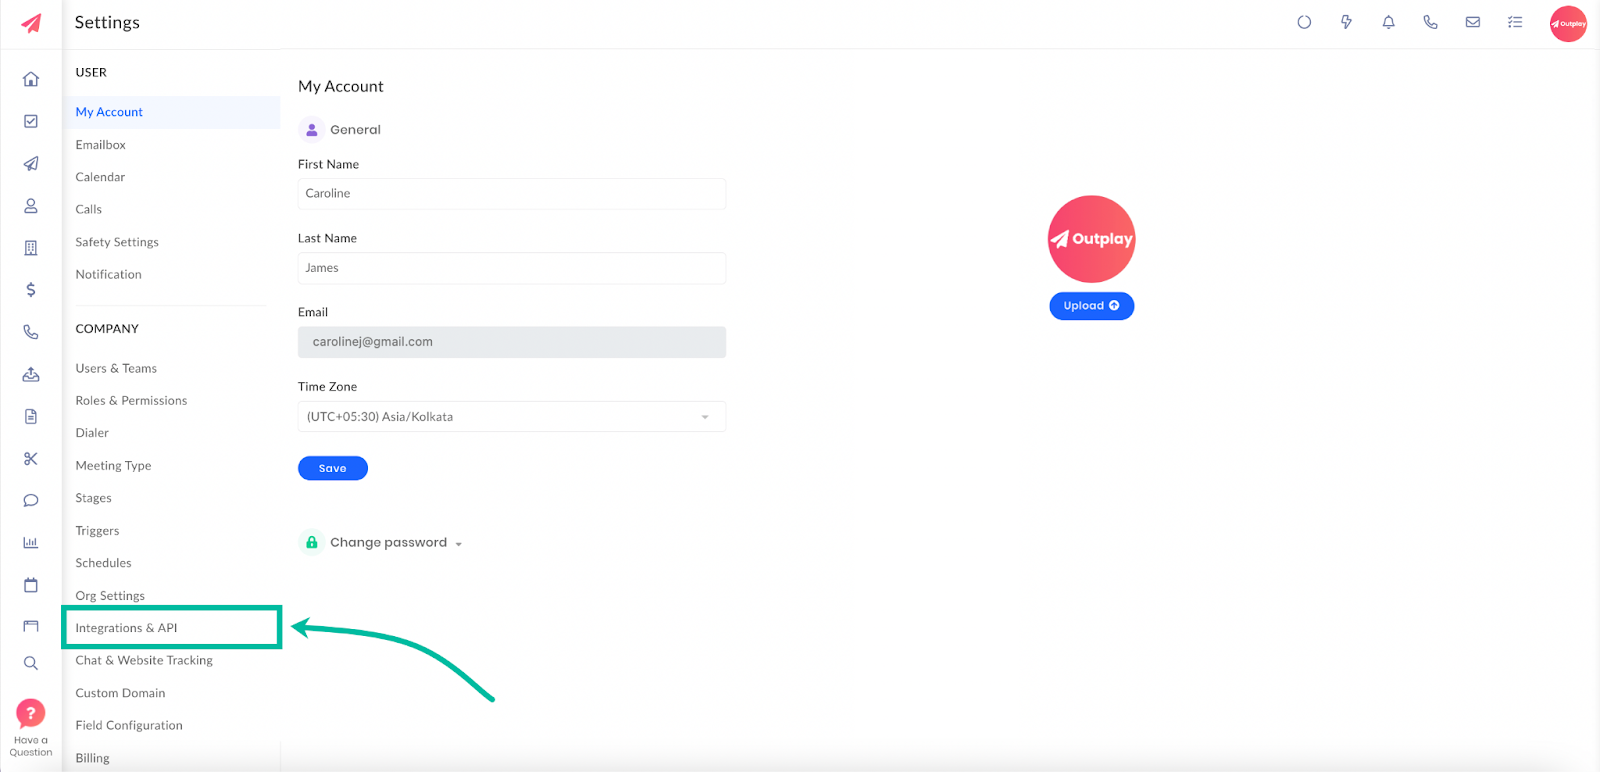
Click Integrations & API.
Navigate to the Dynamics 365 tile and enable the Setup toggle.
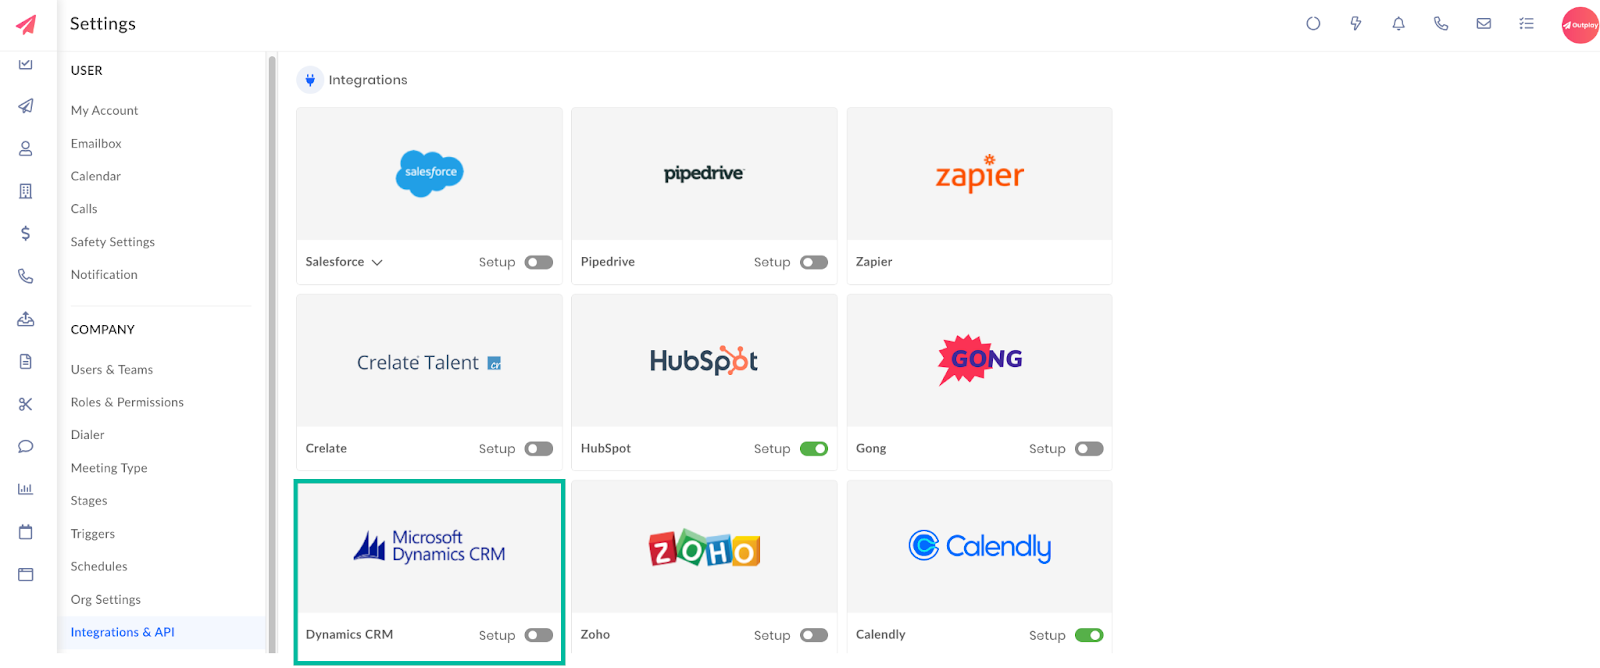
The Verify URL, Client ID & Client Secret dialog box pops up.

You can complete the URL, Client ID & Client Secret fields by entering the credentials obtained from Step 3 and Step 2 respectively and click Connect.
The integration is complete.
Updated on: 25/07/2024
Thank you!