Multi-factor Authentication on Outplay
Multiple factors, maximum security!
Multi-Factor Authentication, or MFA, is a security system that requires more than one method of authentication to login to Outplay. It is designed to provide an additional layer of security for Outplay accounts and protect against unauthorized access.
It is becoming increasingly important for businesses to implement MFA to protect sensitive information and prevent data breaches.
NOTES:
* On Outplay, MFA can be enabled on the Admin and User Level. However, Admin Level setting configuration for multi-factor authentication is offered priority.
* Install Google Authenticator or any authenticator app on your mobile device.
This article discusses the following:
Setup Multi-factor Authentication
Enable MFA for all users
Log into Outplay with MFA
Setup Multi-factor Authentication
Here’s how you can setup MFA for Outplay:
Log into Outplay.

Under the Engagement section, navigate to Profile → Settings.

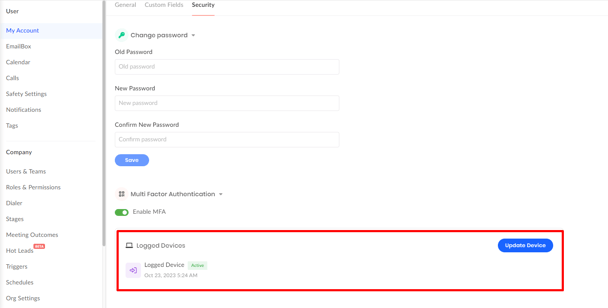
My Account section is displayed by default. Navigate to the Security tab.

Navigate to the Multi-factor Authentication section and enable the toggle for Enable MFA.

The QR Code for the authentication code is displayed. You can open the Google Authenticator app on your mobile device and scan the QR Code.

Alternatively, if you are unable to scan the QR Code, you can copy and paste the key for the same on the Google Authenticator app. Click the Copy button.

Enter the authentication code displayed on the Google Authenticator app in the field for Authentication Code 1 on Outplay.

For Authentication Code 2, you have to wait until the authentication code changes or until your screen display turns off. Once you receive the next authentication code on the Google Authenticator app, enter it in the field for Authentication Code 2 on Outplay.
NOTE: Consecutive authentication codes are only accepted to enable multi-factor authentication for security reasons.
Click Validate.
The authentication is successful and MFA has been enabled for your Outplay account.
TIP: You can view your device in the same section under Logged Devices.
>
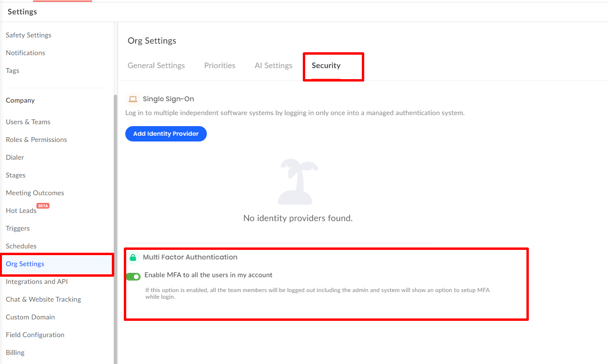
Enable MFA for all users
On Outplay, you can enable MFA for all the users on your account. When you do so, all users will be logged out of their account and are requested to set up MFA while logging into Outplay again.
To enable MFA for all users in your account, navigate to Profile → Settings → Org Settings → Security, and enable the toggle for Enable MFA to all the users in my account.
NOTE: MFA can be enabled for all users in an account by an Outplay Admin only.
>
Log into Outplay with MFA
Here’s how you can log into Outplay with MFA
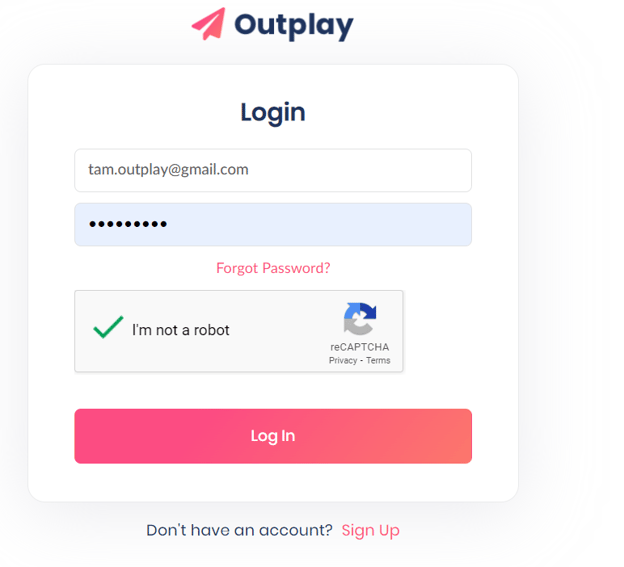
At the Outplay login, you can enter your email address and password in the respective fields and click Login.
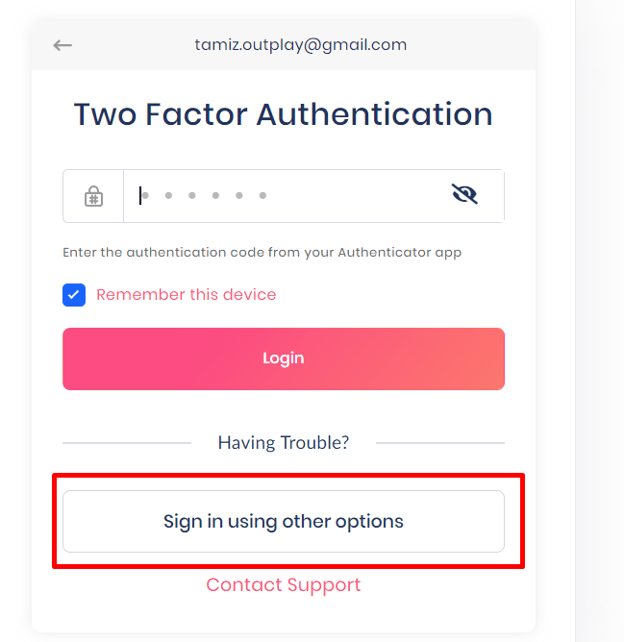
Next, the multi-factor authentication code is requested. You can open your Google Authenticator app and enter the authentication code displayed in the app on Outplay.
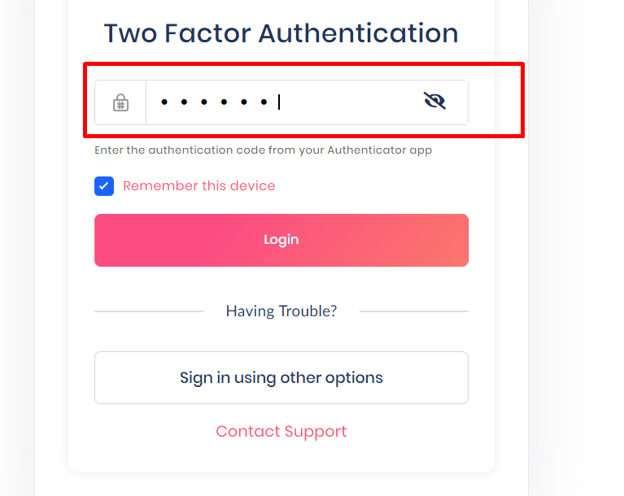
You can select the checkbox for Remember this Device. By doing so, Outplay will remember your device for 30 days and will not request for MFA in this duration.
Click Login.
You have logged into Outplay via MFA successfully.
NOTE: If you face an issue with generating an authentication code, you can choose to sign in to Outplay via OTP.
Click Sign In Using Other Option.
An OTP will be sent to your registered email address with Outplay. You can enter the OTP in the respective field on Outplay and select the checkbox for I’m not a robot to proceed further.
Click Login.
NOTE: Your device is remembered for a duration of 30 days. After which, you can authenticate your device again.
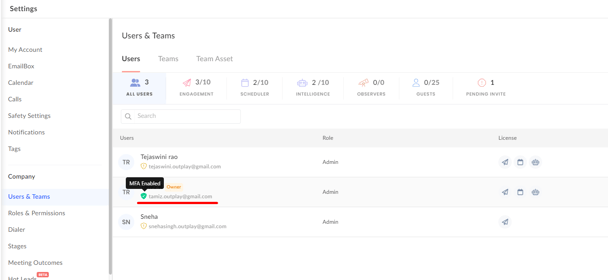
NOTE: Admins can view the MFA Status of all users in their account by navigating to Profile → Settings → Users and Teams. You can hover over the Security icon for each user and view their MFA status.
>
Updated on: 07/06/2024
Thank you!