Tag your records on Outplay
Filter and organize your records easily with tags
During your sales process, you may add a massive number of records to Prospects, Accounts, Templates, and more. It can get quite difficult to keep up with so much information and access essential data when you need it if you don’t have a way to sort.
On Outplay, Tags can help you organize and filter your records easily. They can be applied to records in Prospects, Accounts, Sequences, Templates, and Snippets. What’s more! You can even add tags while importing prospects via CSV file!
Here’s everything you need to know about tags:
Add tags to Prospects, Accounts, Templates & Snippets
On Outplay, you can add tags to records in Prospects, Accounts, Templates and Snippets. Here, let’s take a look at how we can tag records in Prospects:
NOTE: The process to add tags to records in this section is similar for Accounts, Templates and Snippets.
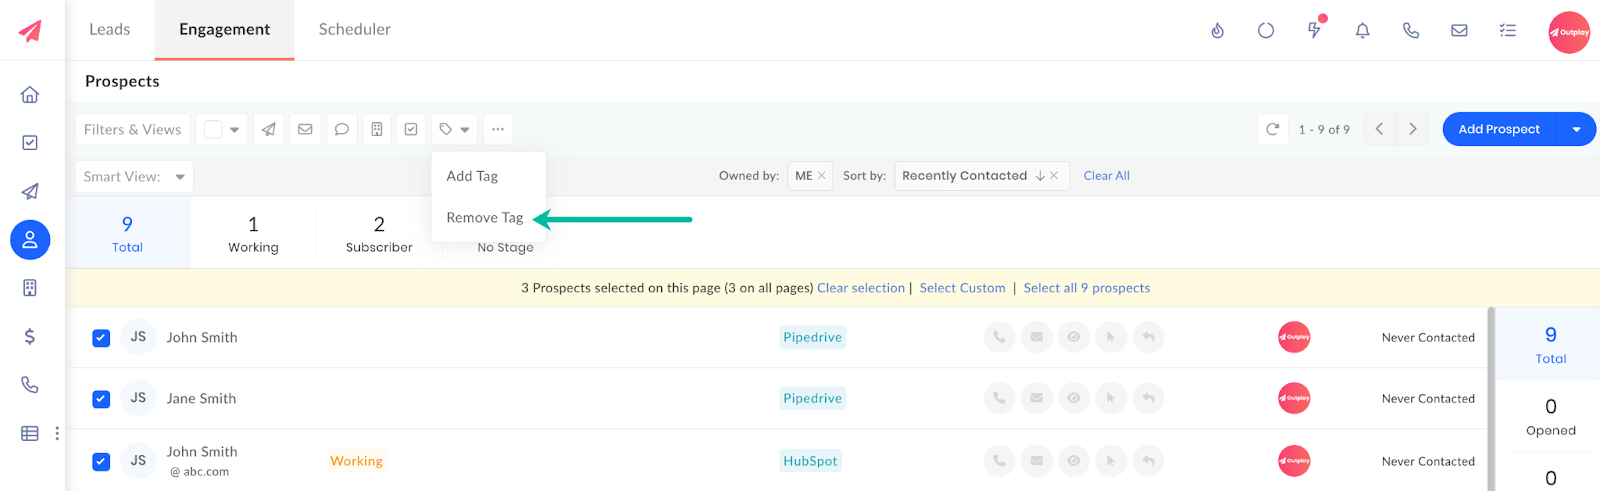
- Log into Outplay.

- In the Engagement section, click Prospects from the sidebar menu.

- Select the checkboxes for the prospects you want to tag.

- Click the Add/ Remove Tag button.

- Select the Add Tag option.

- The Add Tags window pops up. Search or enter the name of the tag you want to add to the prospects. You can also enter a new tag in this field or add multiple tags at the same time.

- Click Yes.
The selected prospects are tagged successfully.
Add tags to sequences
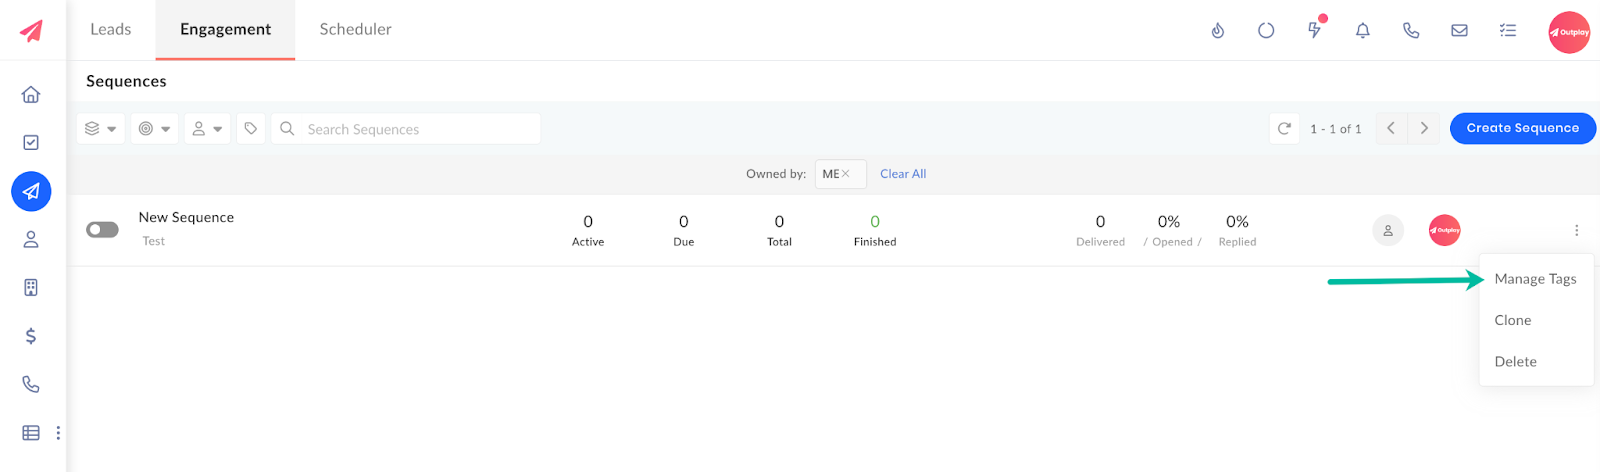
- Log into Outplay.

- In the Engagement section, click Sequences from the sidebar menu.

- Navigate to the sequence of your choice and click the More Options button. Select the Manage Tags option form the drop-down.

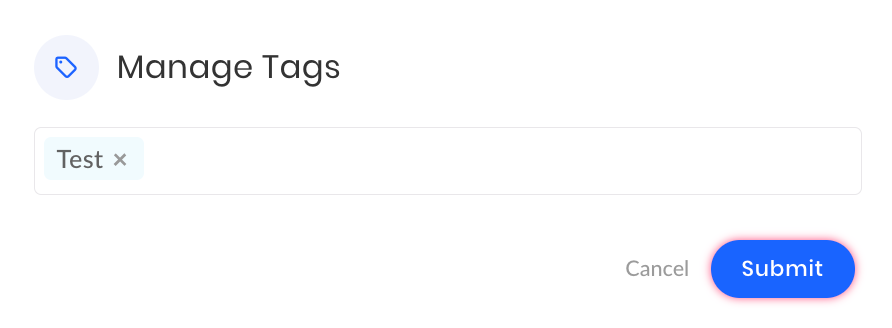
- The Manage Tags window pops up. Search or enter the name of the tag you want to add to the sequence. You can also enter a new tag in this field or add multiple tags at the same time.

- Click Submit.
The sequence is tagged successfully.
Add tags to prospects added via CSV Import
When you add prospects to Outplay via CSV Import, you have the option to add tags in the Review and Import section. You can search or enter the name of a tag to add for the prospects you are importing.

Filter records via tags
For Prospects, Accounts, Templates & Snippets
To view records with a specific tag, you can click the Filters and Views button, and search for Tags in the Filters section.

TIP: You may click a tag and view all records with the same tag as well.

For Sequences
For Sequences, you can click the Tags button in the Sequence section.

The Search by Tags window pops up. Here, you can search for a tag and click Search.

Remove tags
For Prospects, Accounts, Templates & Snippets
To remove tags for your records, you can select the checkboxes for the records, click the Add/ Remove Tags button, and select the Remove Tags option.
The Remove Tags window pops up. You can search and select the tag you want to remove and click Yes.

The tag is removed from the selected records successfully.
For Sequences
To remove tags for sequences, you can navigate to the sequence of your choice, click the More Options button, and select the Manage Tags option.
The Manage Tags window pops up. You can click the delete icon for a specific tag and click Submit.
The tag is removed for the selected sequence successfully.
Manage tags
On Outplay, you can find all your tags in one place. You can view the creator of a tag and the number of records associated with it. Moreover, you can choose to create, edit, delete, and merge tags as required.
- Log into Outplay.
- In the Engagement section, navigate to Profile → Settings.

- Click Tags in the sidebar menu.

- Here, you can view all the tags created in your account. For each tag, you can view the number of records that are associated with the same tag under sections such as Prospects, Accounts, Sequences, Snippets, and Templates. You can also view who created a specific tag.

- You can use the Search Bar to find a specific tag.

- Click the Sort By icon to view tags in the ascending/ descending order of Number of Tags, Created Date, or Owner.

- Navigate to a tag of your choice and click the More Options icon.

- Here, you can choose to:
- Edit the tag: Click the Edit option and the Edit Tag window pops up. Here, you can enter a new name for the tag and click Update.

- * Merge the tag: Click the Merge option and the Merge Tag window pops up. Here, you can select the tag, with which you want to merge, in the Merge With field and click Merge.

- * Delete the tag: Click the Delete option and the Confirm Delete window pops up. Click Delete to confirm the deletion.

NOTE: If a tag is associated with any record, it cannot be deleted.
Updated on: 24/06/2024
Thank you!